-
Notifications
You must be signed in to change notification settings - Fork 11
Tangible Landscape plugin: Analyses
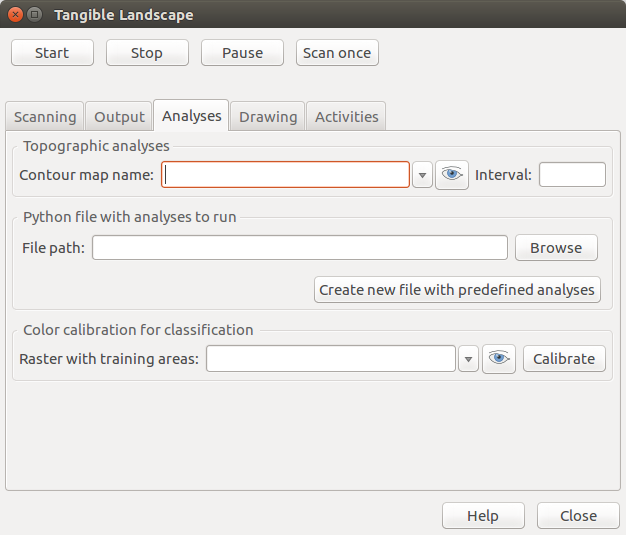
This is the description and explanation of tab Analyses of the Tangible Landscape plugin.

This is a fast way to compute contours from your scan without touching any Python code. When you specify name of the contour vector map and the interval, Tangible Landscape will automatically compute contours. The interval units depend on the units your current GRASS Location is using. The suitable interval can be estimated by inspecting the metadata of the scanned raster, either by right click on the scanned raster - Metadata in Layer Manager, search for min and max values. Or by running this in console (assuming your scanned raster has the name scan):
r.info map=scan
You can also change your interval dynamically during scanning to iteratively determine the best value.
Here you can specify the path to your Python file where you have all your analyses. The button Create new file with predefined analyses allows you to create a new file anywhere and it will already contain examples of analyses (commented out). More about these analyses in Running analyses and developing workflows.
The purpose of this field is to calibrate colors for applications which need to identify different colored regions, it's used for example with colored moldable material or pieces of felt. First, the training area raster needs to be developed. Specifications of this raster:
- the extent should match your reference DEM, see Scanning parameters
- there should be separate areas with values 1, 2, 3, ... representing the different colors
- the color table of the raster should match the color of the felt, otherwise it will be confusing
- there should be one category for the background color as well (when no felt is placed)
- having more than 4-6 colors can be hard to distinguish
The calibration then proceeds this way:
- Load the calibration raster to this entry field. You can press the eye button to load it to your Map Display.
- Position your Map Display on the physical model.
- Place your felt based on the categories it should represent. The felt pieces should cover the training areas entirely.
- Stop scanning if you are currently scanning.
- Press calibrate and wait couple seconds, in the terminal you might get warnings, such as:
WARNING: Removed a singular subsignature number 1 (4 remain)
WARNING: Removed a singular subsignature number 1 (3 remain)
WARNING: Removed a singular subsignature number 1 (2 remain)
WARNING: Removed a singular subsignature number 1 (1 remain)
WARNING: Unreliable clustering. Try a smaller initial number of clusters
WARNING: Removed a singular subsignature number 1 (-1 remain)
WARNING: Unreliable clustering. Try a smaller initial number of clusters
Number of subclasses is 0
If at least 2 remain, it might be ok, otherwise, you need to look at the scan and colors and see what could be the problem:
- the felt doesn't cover the patch completely
- if the projector is not bright enough, the model can have shades from the outside light, which may confuse the calibration.
You can test the detection of colors with this code snippet:
import analyses
def run_colors(scanned_color, env)
    analyses.classify_colors(new='detected_patches', group=scanned_color,
                             compactness=2, threshold=0.3, minsize=10,
useSuperPixels=True, env=env)Getting started
- Software installation
- Physical setup
- Preparing a simple sand model
- Calibration
- Putting it all together
Tangible Landscape plugin manual
- Tangible Landscape plugin: Scanning
- Tangible Landscape plugin: Output
- Tangible Landscape plugin: Analyses
Advanced features
Resources