-
Notifications
You must be signed in to change notification settings - Fork 11
BHIC Tangible Landscape
- Start the computer (power button in the upper right corner).
- Start the projector (using power button on the remote control).
- To start GRASS GIS, use second icon from top in the top left corner (the icon is green and white).
- Select
BH_Islandas Location, andcoastal_gameas Mapset (should be preselected from the last time), pressStart GRASS session. - In case a dialog with title “Lock file found” pops up, click on
Yesand then a second dialog pops up, clickYesagain. - Open existing workspace in the toolbar in the top part of the window (icon with arrow up), alternatively use
Ctrl+Oshortcut orFile>Workspace>Open. - Find file
TL_analysis>coastal_game.gxw(it should be also in the Recently Used files)- Map Display window with the map should start placed on the model and Layer Manager on the laptop screen.
- You need to grab one side of the window and move it a little bit (just few pixels, e.g. one) so that the map covers the whole model - the white space disappears (there is a bug which we need to workaround here).
- Go to Console in Layer Manager, type
g.gui.tangibleand pressEnter.- If you already did that before, press just
arrow upwhich will show the previous command - it should beg.gui.tangible; pressEnter.
- If you already did that before, press just
- Values in the Scanning tab are the ones previously entered.
- Press Scan once to make sure it works and get a fresh scan.
- The dark terminal window will show messages about Kinect (scanner) device connected and working.
- Show the raster layer called scan to see what is scanned.
- As long as the area between the dunes are the same color, you are good.
- If the colors are different, slightly rotate the scanner.
- In the Analysis tab
- Check that there is file
.../TL_analysis/coastal_game.py.
- Check that there is file
- See also:
- you can show and hide individual layers using checking and unchecking the checkbox on the left from layer name
- order of the layers influences which are at the top
- General layers:
-
calm_ocean- water when the ocean is calm -
transportation- roads
-
- Layers related to the game:
-
flooded- flooded buildings -
lake- the storm water -
breach- randomly generated arrow showing where to breach the dune -
score- text showing rounds and number of flooded homes- Reset button removes all text for old rounds.
- The format is: round number - colon - number of flooded homes, e.g.
2: 8for second round and eight flooded homes. - Result is accumulated for subsequent games/rounds.
- When you start GRASS GIS these layers will be the ones from the last previously played game.
-
- Go to Flooding tab in the Tangible Landscape window.
- At the beginning show buildings and transportation layers.
- Scan once in the Analysis tab
- Reset in the Flooding tab to remove records from the previous games/rounds.
- Give sand (budget) to the player.
- people often add more sand to the dune
- this does not help because of how the game is set up
- the real world analogy is that if we would know it needed reinforcement, we would already do that
- sand barriers/dunes must be thick enough, people often build thin barriers to save sand
- scanner won't see them
- the real world analogy is that dune must be thick or dense enough to hold the water
- people often add more sand to the dune
- Push Breach button to generate new position for the breach.
- Show the breach layer by checking it in the Layer Manager.
- Make breach in sand where the arrow points.
- Note that the Breach button and the arrow are just for getting a random position where to make a breach. They are not part of the analysis and you can make a breach at different place or multiple breaches.
- Press the Run button to run the analysis.
- Show lake, flooded and score layers.
- Optionally, before running another game/round,hide the storm-related layers.
- Fill breach before the next round.
- Alternatively, you can be adding more breaches.
- For the next round, let a different person or give more sand to the same person.
- Continue with the Breach button and make (physical) breach in sand.
It is a reduced complexity (i.e. simple) model for coastal flooding based on the water level or the level of the waves during a storm event which floods everything reachable by the water at the given level. Turn off the interactive system
- Close the GRASS window from the layer manager.
- It asks if you want to close GUI or quit GRASS GIS, select
Quit GRASS GIS. Note: if you close GRASS otherwise (close terminal which shuts down the entire application), the clean up procedures won’t happen resulting in a dialog “Lock file found”, see solution during application start.
- It asks if you want to close GUI or quit GRASS GIS, select
- Turn off the computer or put it to sleep
- Use the power symbol in the upper right corner of the screen. It will asks you for confirmation.
- Suspend from the menu (not by closing the lid). Once it is suspended you can close the lid.
- Turn off the projector after suspending the computer.
- Turn off projector using the projector remote control, click power twice.
- If you want to unplug the electricity, let the projector cool down first (there is a small indicator of the cooling at the projector itself - the power button on the projector is flashing red - which is not well visible when the projector is high). After few minutes after shutting it down, it should be save to unplug it.
| Field | Value | When to change |
|---|---|---|
| Scanned raster | scan | No need to change it |
| Reference DEM | BH_ground_1m_base | Changed only if we change data |
| Z exaggeration | 4 | When (exaggeration of) the model changes |
| Number of scans | 2 | More for more precise, less for faster |
| Rotation | 180 | Always the same for usual setup |
| Smoothing | 7 | More for smoother, less for faster |
| Resolution | 2 | Less for more precise, more for faster |
| Limit vertically | 60 87 | When setup changed vertically |
| Trim scan NSEW | 20 42 38 45 | When setup changed horizontally |
| Trim tolerance | 0.3 | No need to change it |
Trim scan (NSEW) is measured from the center of the scanner. It is needed when the space around the model is not clear from other things (like laptop, piles of sand) but in any case must include the model. To set the values change the vertical limits to something wider (remember what you had there before) and you should then see some things placed on the table around the model as scanned and projected over the model. This will help you to see how far you are scanning and how much you want to trim. Do not trim too much to be sure you include the whole model. At the end, set the vertical limits back to the original values.
- sometimes scanner does not scan
- in the terminal it may show no device connected or some other message
- unplug scanner from power to reboot (use the electric cable to disconnect)
- scanning doesn't finish
- Tangible Landscape window is all grayed out
- output in the terminal is one line over and over again
- go to Dash (...) or Launcher and start System Monitor
- find process called r.in.kinect
- right click and select Kill
- See also: Troubleshooting
- Contact your collaborators at NCSU or open an issue in this repository.
- Include take a picture of the actual model and setup.
- Take a screenshot of the screen (
Prt Scbutton on the keyboard).
- See: Setup
- animation showing changes in coastline from 18.. to 2014
- physical model is based on 2014 topography data
- elevations magnified/exaggerated 10 times
- See also: https://github.com/petrasovaa/BH-Island-animation
- Ratio of the projector:
- Auto-keystone off
- Keystone: -2
Notes for advanced setup of the Raspberry Pi computer. See also:
The system menu bar (which starts with Menu with a raspberry picture) can be moved around using right click on the empty space in the bar and selecting Panel Settings. Change the screen edge to stick it to using Edge selection under Position.
These are the steps done for the Raspberry Pi computer.
Using the sudo and cp commands make a backup copy of the settings which are stored in a text file:
sudo cp /etc/lightdm/lightdm.conf /etc/lightdm/lightdm.conf.backup
Open the file /etc/lightdm/lightdm.conf using sudo command and nano editor:
sudo nano /etc/lightdm/lightdm.conf
Use arrows to scroll down and find line
[SeatDefaults]
and then find a following line which says:
#xserver-command=X
and change it to:
xserver-command=X -s 0 -dpms
We removed # at the beginning to active the line and set the parameters which disable screen and power saving features. Use Ctrl+X followed by Y and Enter to save the file.
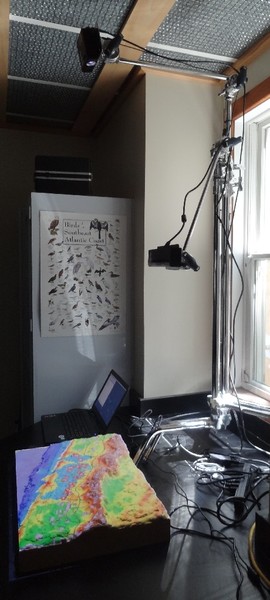
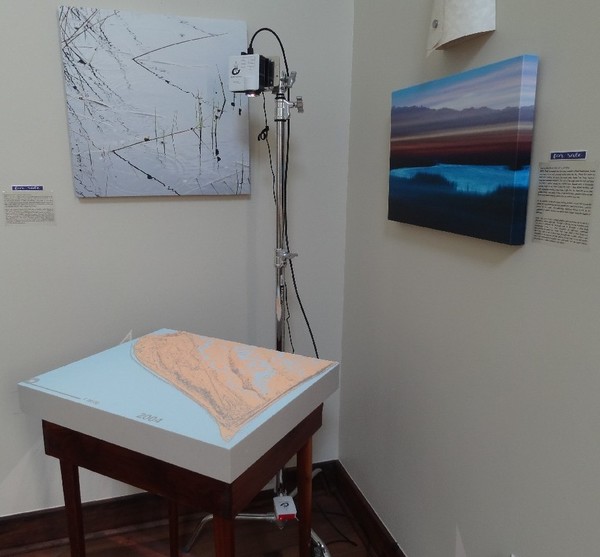
| Coastal Game | Animation Setup |
|---|---|
 |
 |
Getting started
- Software installation
- Physical setup
- Preparing a simple sand model
- Calibration
- Putting it all together
Tangible Landscape plugin manual
- Tangible Landscape plugin: Scanning
- Tangible Landscape plugin: Output
- Tangible Landscape plugin: Analyses
Advanced features
Resources