-
Notifications
You must be signed in to change notification settings - Fork 3
_SKU_SEN0177_PM2.5激光粉尘传感器
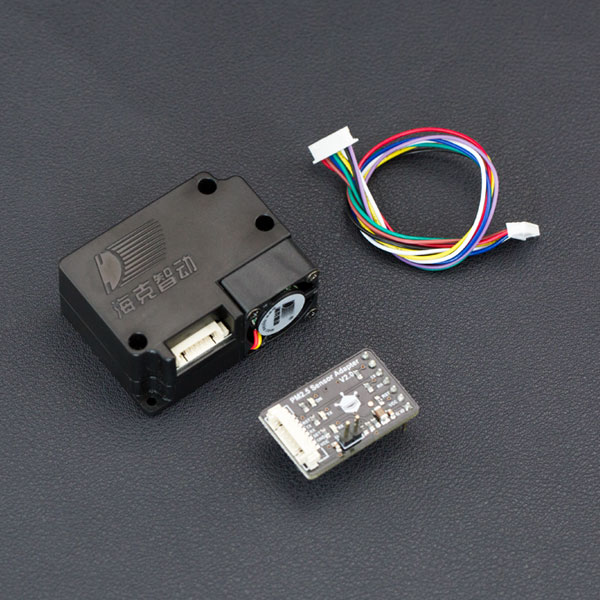
PM2.5激光粉尘传感器是一款数字式通用颗粒物浓度传感器,可以用于获得单位体积内空气中0.3~10微米悬浮颗粒物个数,即颗粒物浓度,并以数字接口形式输出,同时也可输出每种粒子的质量数据。本传感器可嵌入各种与空气中悬浮颗粒物浓度相关的仪器仪表或环境改善设备,为其提供及时准确的浓度数据。
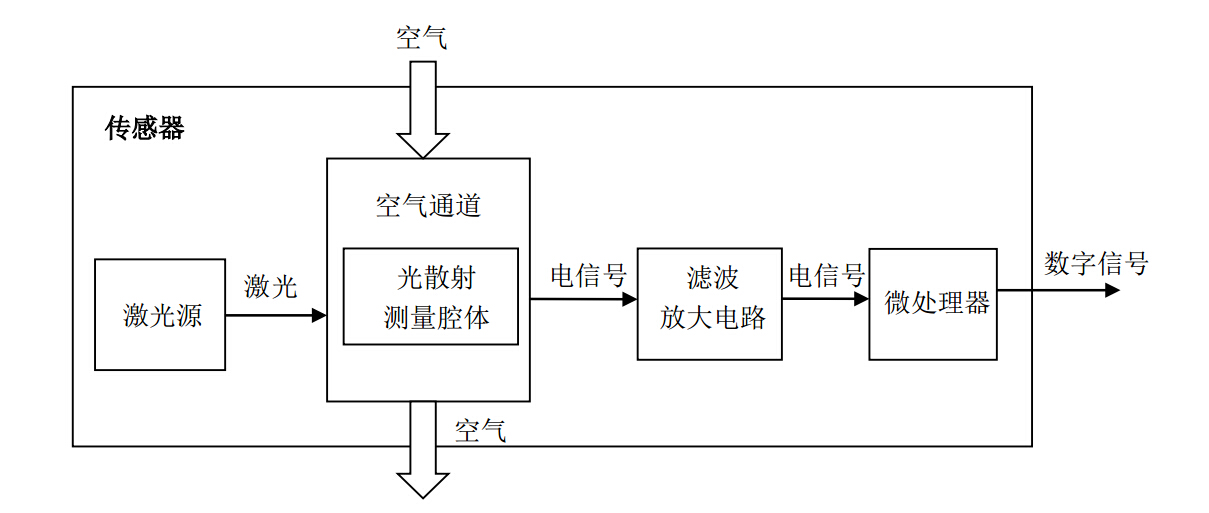
本传感器采用激光散射原理。即令激光照射在空气中的悬浮颗粒物上产生散射,同时在某一特定角度收集散射光,得到散射光强随时间变化的曲线。微处理器采集数据后,通过傅立叶变换得到时域与频域间的关系,随后经过一系列复杂算法得出颗粒物的等效粒径及单位体积内不同粒径的颗粒物数量。传感器各功能部分框图如图所示:
- 工作电压 : 4.95 ~ 5.05V
- 最大工作电流 : 120mA
- 测量范围 : 0.3~1.0、1.0~2.5、2.5~10微米(um)
- 量程 :0~500 ug/m3
- 待机电流 : ≤200 微安(uA)
- 响应时间 : ≤10 s
- 工作温度范围 : -20 ~ 50摄氏度
- 工作湿度范围 : 0~99% RH
- 最大尺寸 : 65×42×23(mm)
- 平均无故障时间 : >=5年
主要特性:
- 响应迅速
- 标准串口输字输出
- 二阶曲线多点校准
- 最小分辨粒径0.3微米
供电电源质量要求:
1、 纹波小于100mV。
2、 电源电压稳定度:4.95~5.05V。
3、 电源功率:大于1W (电流大于200mA)。
4、 上下电电压冲击小于系统电源电压的50%。
| | |
| ---------------------------------- | |
| | |
|
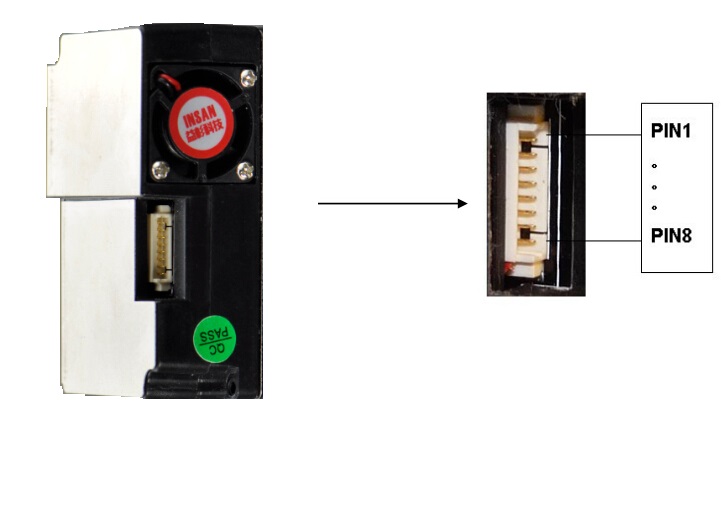
| 传感器引脚 | Arduino引脚 | 功能描述 |
| Pin 1 | VCC | 电源正 |
| Pin 2 | GND | 电源负 |
| Pin 3 | SET | 模式设置 |
| Pin 4 | RXD | 串口接收管脚(3.3V电平) |
| Pin 5 | TXD | 串口发送管脚(3.3V电平) |
| Pin 6 | RESET | 模块复位信号(低电平复位,不使用时拉高) |
| Pin 7、8 | NC | 悬空 |
| 注意:
SET引脚:
SET=1模块工作在连续采样方式下,模块在每一次采样结束后主动上传采样数据,采样响应时间为1S。
SET=0 模块进入低功耗待机模式。
RESET引脚用户可不必操作。 |
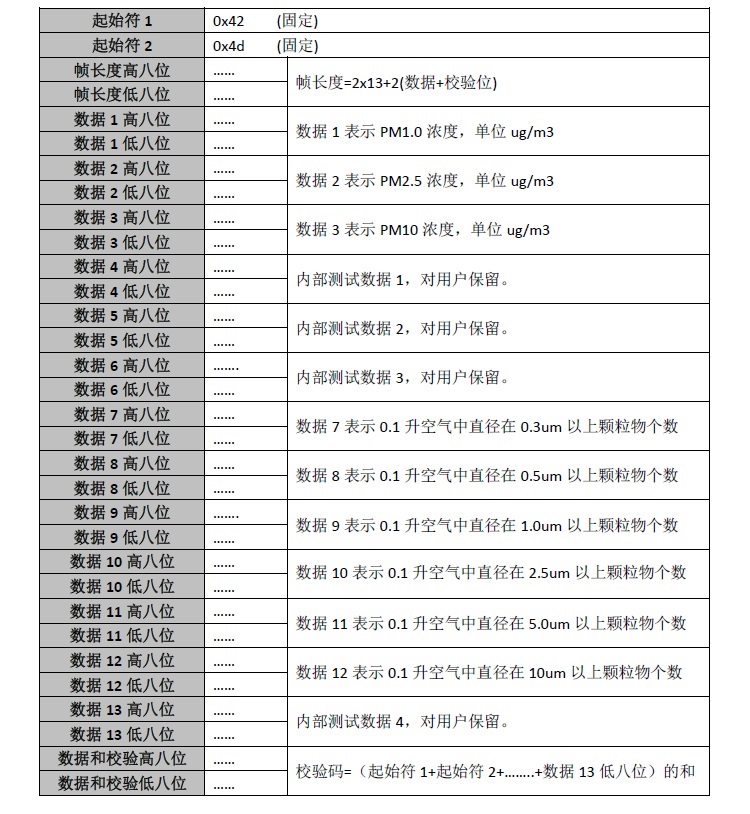
串口波特率:9600; 校验位:无; 停止位:1位; 数据包长度固定为32字节。
如果你有IO扩展板就可以下载代码后将PM2.5传感器转接板直插上IO扩展板,就可以用串口监视PM2.5,PM1.0和PM10的数据了。由于激光PM2.5/10灰尘/颗粒物传感器模块通讯方式是用串口实现,而DFRobot UNO R3只有一个独立的串口,所以需要先下载arduino代码之后再插上传感器,否则程序下载会出现问题。

| :注意: :此样例只能由 arduino.cc 提供的IDE 1.6.x 及以上版本才能正常编译 |
感谢论坛友人zuyang提供的原代码。 另,相比本教程使用硬件串口引脚,原代码使用软串口D10 D11 对应RX TX,可以释放硬件串口,对于连接多个串口设备有帮助。相关内容请点击这里
|
 //******************************
 //*Abstract: Read value of PM1,PM2.5 and PM10 of air quality
 //*Product Link: http://www.dfrobot.com.cn/goods-1113.html
 //
 //*Version:V3.1
 //*Author:Zuyang @ HUST
 //*Modified by Cain for Arduino Hardware Serial port compatibility
 //*Date:March.25.2016
 //******************************
#include <Arduino.h>
#define LENG 31   //0x42 + 31 bytes equal to 32 bytes
unsigned char buf[LENG];

int PM01Value=0;          //define PM1.0 value of the air detector module
int PM2_5Value=0;         //define PM2.5 value of the air detector module
int PM10Value=0;         //define PM10 value of the air detector module


void setup()
{
  Serial.begin(9600);   //使用串口0
  Serial.setTimeout(1500);    //设置超时时间为1500毫秒(大于传感器传送数据周期1秒)

}

void loop()
{
  if(Serial.find(0x42)){    //检测到0x42时,开始读取
    Serial.readBytes(buf,LENG);

    if(buf[0] == 0x4d){
      if(checkValue(buf,LENG)){
        PM01Value=transmitPM01(buf); //count PM1.0 value of the air detector module
        PM2_5Value=transmitPM2_5(buf);//count PM2.5 value of the air detector module
        PM10Value=transmitPM10(buf); //count PM10 value of the air detector module
      }
    }
  }

  static unsigned long OledTimer=millis();
    if (millis() - OledTimer >=1000)
    {
      OledTimer=millis();

      Serial.print("PM1.0: ");
      Serial.print(PM01Value);
      Serial.println("  ug/m3");

      Serial.print("PM2.5: ");
      Serial.print(PM2_5Value);
      Serial.println("  ug/m3");

      Serial.print("PM1 0: ");
      Serial.print(PM10Value);
      Serial.println("  ug/m3");
      Serial.println();
    }

}
char checkValue(unsigned char *thebuf, char leng)
{
  char receiveflag=0;
  int receiveSum=0;

  for(int i=0; i<(leng-2); i++){
  receiveSum=receiveSum+thebuf[i];
  }
  receiveSum=receiveSum + 0x42;

  if(receiveSum == ((thebuf[leng-2]<<8)+thebuf[leng-1]))  //check the serial data
  {
    receiveSum = 0;
    receiveflag = 1;
  }
  return receiveflag;
}

int transmitPM01(unsigned char *thebuf)
{
  int PM01Val;
  PM01Val=((thebuf[3]<<8) + thebuf[4]); //count PM1.0 value of the air detector module
  return PM01Val;
}

//transmit PM Value to PC
int transmitPM2_5(unsigned char *thebuf)
{
  int PM2_5Val;
  PM2_5Val=((thebuf[5]<<8) + thebuf[6]);//count PM2.5 value of the air detector module
  return PM2_5Val;
  }

//transmit PM Value to PC
int transmitPM10(unsigned char *thebuf)
{
  int PM10Val;
  PM10Val=((thebuf[7]<<8) + thebuf[8]); //count PM10 value of the air detector module
  return PM10Val;
}
|}
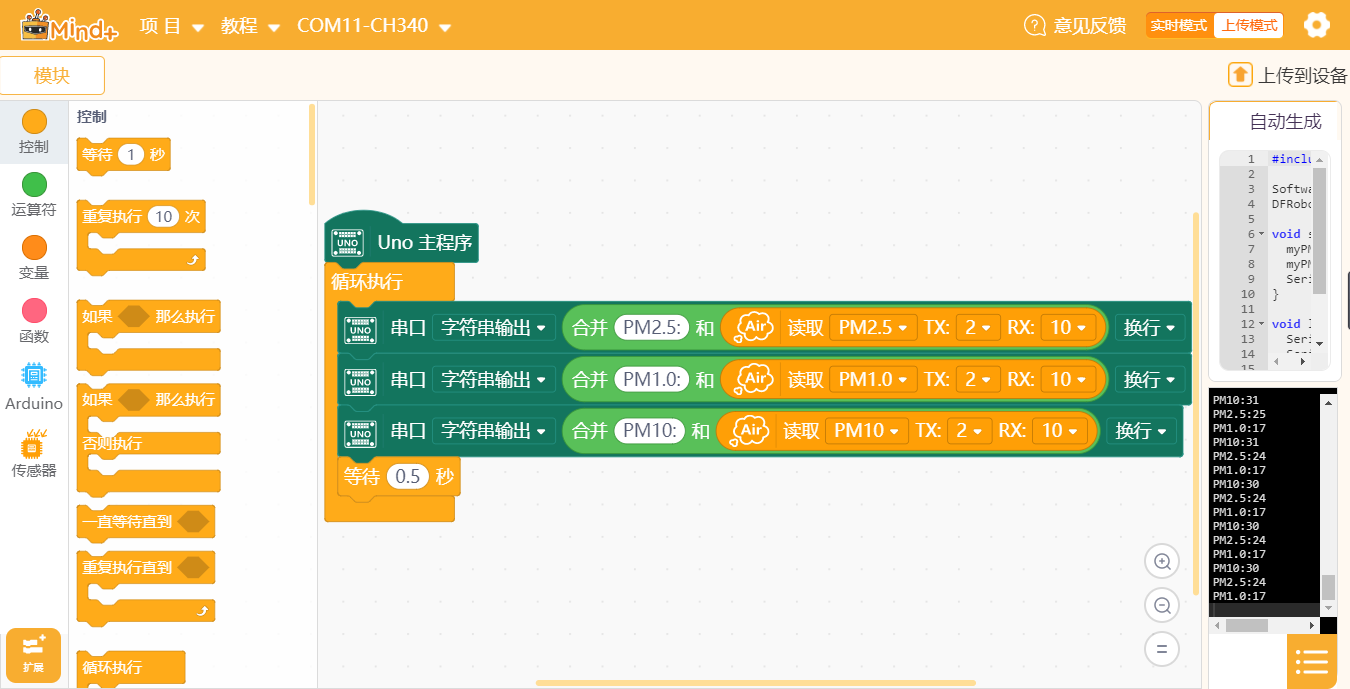
1、下载及安装软件。下载地址:http://www.mindplus.cc 详细教程:Mind+基础wiki教程-软件下载安装 2、切换到“上传模式”。 详细教程:Mind+基础wiki教程-上传模式编程流程 3、“扩展”中选择“主控板”中的“Arduino Uno”,“传感器”中加载“PM2.5激光粉尘传感器”。 详细教程:Mind+基础wiki教程-加载扩展库流程 4、进行编程,程序如下图: 5、菜单“连接设备”,“上传到设备” 6、程序上传完毕后,打开串口即可看到数据输出。详细教程:Mind+基础wiki教程-串口打印
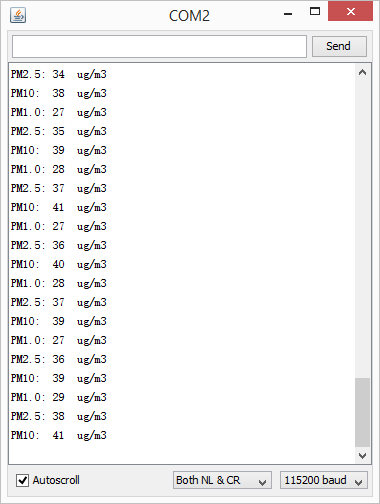
打开串口监视器,将波特率调整到9600,读取PM2.5、PM1.0及PM10的值。
