-
Notifications
You must be signed in to change notification settings - Fork 0
New issue
Have a question about this project? Sign up for a free GitHub account to open an issue and contact its maintainers and the community.
By clicking “Sign up for GitHub”, you agree to our terms of service and privacy statement. We’ll occasionally send you account related emails.
Already on GitHub? Sign in to your account
chore: removing unused dependencies #1
base: main
Are you sure you want to change the base?
Conversation
5bde719 to
f3945dc
Compare
New dependencies@actions/core
README.md# `@actions/core`
UsageImport the package// javascript
const core = require('@actions/core');
// typescript
import * as core from '@actions/core';Inputs/OutputsAction inputs can be read with Outputs can be set with const myInput = core.getInput('inputName', { required: true });
const myBooleanInput = core.getBooleanInput('booleanInputName', { required: true });
const myMultilineInput = core.getMultilineInput('multilineInputName', { required: true });
core.setOutput('outputKey', 'outputVal');Exporting variablesSince each step runs in a separate process, you can use core.exportVariable('envVar', 'Val');Setting a secretSetting a secret registers the secret with the runner to ensure it is masked in logs. core.setSecret('myPassword');PATH ManipulationTo make a tool's path available in the path for the remainder of the job (without altering the machine or containers state), use core.addPath('/path/to/mytool');Exit codesYou should use this library to set the failing exit code for your action. If status is not set and the script runs to completion, that will lead to a success. const core = require('@actions/core');
try {
// Do stuff
}
catch (err) {
// setFailed logs the message and sets a failing exit code
core.setFailed(`Action failed with error ${err}`);
}Note that LoggingFinally, this library provides some utilities for logging. Note that debug logging is hidden from the logs by default. This behavior can be toggled by enabling the Step Debug Logs. const core = require('@actions/core');
const myInput = core.getInput('input');
try {
core.debug('Inside try block');
if (!myInput) {
core.warning('myInput was not set');
}
if (core.isDebug()) {
// curl -v https://github.com
} else {
// curl https://github.com
}
// Do stuff
core.info('Output to the actions build log')
core.notice('This is a message that will also emit an annotation')
}
catch (err) {
core.error(`Error ${err}, action may still succeed though`);
}This library can also wrap chunks of output in foldable groups. const core = require('@actions/core')
// Manually wrap output
core.startGroup('Do some function')
doSomeFunction()
core.endGroup()
// Wrap an asynchronous function call
const result = await core.group('Do something async', async () => {
const response = await doSomeHTTPRequest()
return response
})AnnotationsThis library has 3 methods that will produce annotations. core.error('This is a bad error, action may still succeed though.')
core.warning('Something went wrong, but it\'s not bad enough to fail the build.')
core.notice('Something happened that you might want to know about.')These will surface to the UI in the Actions page and on Pull Requests. They look something like this: These annotations can also be attached to particular lines and columns of your source files to show exactly where a problem is occuring. These options are: export interface AnnotationProperties {
/**
* A title for the annotation.
*/
title?: string
/**
* The name of the file for which the annotation should be created.
*/
file?: string
/**
* The start line for the annotation.
*/
startLine?: number
/**
* The end line for the annotation. Defaults to `startLine` when `startLine` is provided.
*/
endLine?: number
/**
* The start column for the annotation. Cannot be sent when `startLine` and `endLine` are different values.
*/
startColumn?: number
/**
* The end column for the annotation. Cannot be sent when `startLine` and `endLine` are different values.
* Defaults to `startColumn` when `startColumn` is provided.
*/
endColumn?: number
}Styling outputColored output is supported in the Action logs via standard ANSI escape codes. 3/4 bit, 8 bit and 24 bit colors are all supported. Foreground colors: // 3/4 bit
core.info('\u001b[35mThis foreground will be magenta')
// 8 bit
core.info('\u001b[38;5;6mThis foreground will be cyan')
// 24 bit
core.info('\u001b[38;2;255;0;0mThis foreground will be bright red')Background colors: // 3/4 bit
core.info('\u001b[43mThis background will be yellow');
// 8 bit
core.info('\u001b[48;5;6mThis background will be cyan')
// 24 bit
core.info('\u001b[48;2;255;0;0mThis background will be bright red')Special styles: core.info('\u001b[1mBold text')
core.info('\u001b[3mItalic text')
core.info('\u001b[4mUnderlined text')ANSI escape codes can be combined with one another: core.info('\u001b[31;46mRed foreground with a cyan background and \u001b[1mbold text at the end');
core.info('\u001b[35mThis foreground will be magenta')
core.info('This foreground will reset to the default')
Manually typing escape codes can be a little difficult, but you can use third party modules such as ansi-styles. const style = require('ansi-styles');
core.info(style.color.ansi16m.hex('#abcdef') + 'Hello world!')Action stateYou can use this library to save state and get state for sharing information between a given wrapper action: action.yml: name: 'Wrapper action sample'
inputs:
name:
default: 'GitHub'
runs:
using: 'node12'
main: 'main.js'
post: 'cleanup.js'In action's const core = require('@actions/core');
core.saveState("pidToKill", 12345);In action's const core = require('@actions/core');
var pid = core.getState("pidToKill");
process.kill(pid);OIDC TokenYou can use these methods to interact with the GitHub OIDC provider and get a JWT ID token which would help to get access token from third party cloud providers. Method Name: getIDToken() Inputs audience : optional Outputs A JWT ID Token In action's const core = require('@actions/core');
async function getIDTokenAction(): Promise<void> {
const audience = core.getInput('audience', {required: false})
const id_token1 = await core.getIDToken() // ID Token with default audience
const id_token2 = await core.getIDToken(audience) // ID token with custom audience
// this id_token can be used to get access token from third party cloud providers
}
getIDTokenAction()In action's name: 'GetIDToken'
description: 'Get ID token from Github OIDC provider'
inputs:
audience:
description: 'Audience for which the ID token is intended for'
required: false
outputs:
id_token1:
description: 'ID token obtained from OIDC provider'
id_token2:
description: 'ID token obtained from OIDC provider'
runs:
using: 'node12'
main: 'dist/index.js'Filesystem path helpersYou can use these methods to manipulate file paths across operating systems. The toPosixPath('\\foo\\bar') // => /foo/bar
toWin32Path('/foo/bar') // => \foo\barThe // On a Windows runner.
toPlatformPath('/foo/bar') // => \foo\bar
// On a Linux runner.
toPlatformPath('\\foo\\bar') // => /foo/bar@actions/github
README.md# `@actions/github`
UsageReturns an authenticated Octokit client that follows the machine proxy settings and correctly sets GHES base urls. See https://octokit.github.io/rest.js for the API. const github = require('@actions/github');
const core = require('@actions/core');
async function run() {
// This should be a token with access to your repository scoped in as a secret.
// The YML workflow will need to set myToken with the GitHub Secret Token
// myToken: ${{ secrets.GITHUB_TOKEN }}
// https://help.github.com/en/actions/automating-your-workflow-with-github-actions/authenticating-with-the-github_token#about-the-github_token-secret
const myToken = core.getInput('myToken');
const octokit = github.getOctokit(myToken)
// You can also pass in additional options as a second parameter to getOctokit
// const octokit = github.getOctokit(myToken, {userAgent: "MyActionVersion1"});
const { data: pullRequest } = await octokit.rest.pulls.get({
owner: 'octokit',
repo: 'rest.js',
pull_number: 123,
mediaType: {
format: 'diff'
}
});
console.log(pullRequest);
}
run();You can also make GraphQL requests. See https://github.com/octokit/graphql.js for the API. const result = await octokit.graphql(query, variables);Finally, you can get the context of the current action: const github = require('@actions/github');
const context = github.context;
const newIssue = await octokit.rest.issues.create({
...context.repo,
title: 'New issue!',
body: 'Hello Universe!'
});Webhook payload typescript definitionsThe npm module First, install the npm module Then, assert the type based on the eventName import * as core from '@actions/core'
import * as github from '@actions/github'
import {PushEvent} from '@octokit/webhooks-definitions/schema'
if (github.context.eventName === 'push') {
const pushPayload = github.context.payload as PushEvent
core.info(`The head commit is: ${pushPayload.head_commit}`)
}Extending the Octokit instance
For example, using the import { GitHub, getOctokitOptions } from '@actions/github/lib/utils'
import { enterpriseServer220Admin } from '@octokit/plugin-enterprise-server'
const octokit = GitHub.plugin(enterpriseServer220Admin)
// or override some of the default values as well
// const octokit = GitHub.plugin(enterpriseServer220Admin).defaults({userAgent: "MyNewUserAgent"})
const myToken = core.getInput('myToken');
const myOctokit = new octokit(getOctokitOptions(token))
// Create a new user
myOctokit.rest.enterpriseAdmin.createUser({
login: "testuser",
email: "[email protected]",
});jsdom
README.md
jsdom is a pure-JavaScript implementation of many web standards, notably the WHATWG DOM and HTML Standards, for use with Node.js. In general, the goal of the project is to emulate enough of a subset of a web browser to be useful for testing and scraping real-world web applications. The latest versions of jsdom require Node.js v18 or newer. (Versions of jsdom below v23 still work with previous Node.js versions, but are unsupported.) Basic usageconst jsdom = require("jsdom");
const { JSDOM } = jsdom;To use jsdom, you will primarily use the const dom = new JSDOM(`<!DOCTYPE html><p>Hello world</p>`);
console.log(dom.window.document.querySelector("p").textContent); // "Hello world"(Note that jsdom will parse the HTML you pass it just like a browser does, including implied The resulting object is an instance of the const { window } = new JSDOM(`...`);
// or even
const { document } = (new JSDOM(`...`)).window;Full documentation on everything you can do with the Customizing jsdomThe Simple optionsconst dom = new JSDOM(``, {
url: "https://example.org/",
referrer: "https://example.com/",
contentType: "text/html",
includeNodeLocations: true,
storageQuota: 10000000
});
Note that both Executing scriptsjsdom's most powerful ability is that it can execute scripts inside the jsdom. These scripts can modify the content of the page and access all the web platform APIs jsdom implements. However, this is also highly dangerous when dealing with untrusted content. The jsdom sandbox is not foolproof, and code running inside the DOM's const dom = new JSDOM(`<body>
<div id="content"></div>
<script>document.getElementById("content").append(document.createElement("hr"));</script>
</body>`);
// The script will not be executed, by default:
console.log(dom.window.document.getElementById("content").children.length); // 0To enable executing scripts inside the page, you can use the const dom = new JSDOM(`<body>
<div id="content"></div>
<script>document.getElementById("content").append(document.createElement("hr"));</script>
</body>`, { runScripts: "dangerously" });
// The script will be executed and modify the DOM:
console.log(dom.window.document.getElementById("content").children.length); // 1Again we emphasize to only use this when feeding jsdom code you know is safe. If you use it on arbitrary user-supplied code, or code from the Internet, you are effectively running untrusted Node.js code, and your machine could be compromised. If you want to execute external scripts, included via Event handler attributes, like If you are simply trying to execute script "from the outside", instead of letting const dom = new JSDOM(`<body>
<div id="content"></div>
<script>document.getElementById("content").append(document.createElement("hr"));</script>
</body>`, { runScripts: "outside-only" });
// run a script outside of JSDOM:
dom.window.eval('document.getElementById("content").append(document.createElement("p"));');
console.log(dom.window.document.getElementById("content").children.length); // 1
console.log(dom.window.document.getElementsByTagName("hr").length); // 0
console.log(dom.window.document.getElementsByTagName("p").length); // 1This is turned off by default for performance reasons, but is safe to enable. Note that in the default configuration, without setting We strongly advise against trying to "execute scripts" by mashing together the jsdom and Node global environments (e.g. by doing Finally, for advanced use cases you can use the Pretending to be a visual browserjsdom does not have the capability to render visual content, and will act like a headless browser by default. It provides hints to web pages through APIs such as When the
const window = (new JSDOM(``, { pretendToBeVisual: true })).window;

window.requestAnimationFrame(timestamp => {
  console.log(timestamp > 0);
});
Note that jsdom still does not do any layout or rendering, so this is really just about pretending to be visual, not about implementing the parts of the platform a real, visual web browser would implement. Loading subresourcesBasic optionsBy default, jsdom will not load any subresources such as scripts, stylesheets, images, or iframes. If you'd like jsdom to load such resources, you can pass the
When attempting to load resources, recall that the default value for the Advanced configurationTo more fully customize jsdom's resource-loading behavior, you can pass an instance of the const resourceLoader = new jsdom.ResourceLoader({
proxy: "http://127.0.0.1:9001",
strictSSL: false,
userAgent: "Mellblomenator/9000",
});
const dom = new JSDOM(``, { resources: resourceLoader });The three options to the
You can further customize resource fetching by subclassing class CustomResourceLoader extends jsdom.ResourceLoader {
fetch(url, options) {
// Override the contents of this script to do something unusual.
if (url === "https://example.com/some-specific-script.js") {
return Promise.resolve(Buffer.from("window.someGlobal = 5;"));
}
return super.fetch(url, options);
}
}jsdom will call your custom resource loader's One of the options you will receive in class CustomResourceLoader extends jsdom.ResourceLoader {
fetch(url, options) {
if (options.element) {
console.log(`Element ${options.element.localName} is requesting the url ${url}`);
}
return super.fetch(url, options);
}
}Virtual consolesLike web browsers, jsdom has the concept of a "console". This records both information directly sent from the page, via scripts executing inside the document, as well as information from the jsdom implementation itself. We call the user-controllable console a "virtual console", to distinguish it from the Node.js By default, the const virtualConsole = new jsdom.VirtualConsole();
const dom = new JSDOM(``, { virtualConsole });Code like this will create a virtual console with no behavior. You can give it behavior by adding event listeners for all the possible console methods: virtualConsole.on("error", () => { ... });
virtualConsole.on("warn", () => { ... });
virtualConsole.on("info", () => { ... });
virtualConsole.on("dir", () => { ... });
// ... etc. See https://console.spec.whatwg.org/#logging(Note that it is probably best to set up these event listeners before calling If you simply want to redirect the virtual console output to another console, like the default Node.js one, you can do virtualConsole.sendTo(console);There is also a special event,
If you're using virtualConsole.sendTo(c, { omitJSDOMErrors: true });Cookie jarsLike web browsers, jsdom has the concept of a cookie jar, storing HTTP cookies. Cookies that have a URL on the same domain as the document, and are not marked HTTP-only, are accessible via the By default, the const cookieJar = new jsdom.CookieJar(store, options);
const dom = new JSDOM(``, { cookieJar });This is mostly useful if you want to share the same cookie jar among multiple jsdoms, or prime the cookie jar with certain values ahead of time. Cookie jars are provided by the tough-cookie package. The Intervening before parsingjsdom allows you to intervene in the creation of a jsdom very early: after the const dom = new JSDOM(`<p>Hello</p>`, {
beforeParse(window) {
window.document.childNodes.length === 0;
window.someCoolAPI = () => { /* ... */ };
}
});This is especially useful if you are wanting to modify the environment in some way, for example adding shims for web platform APIs jsdom does not support.
|
| Description | Lodash modular utilities. |
| License | MIT |
| Created on | 2012-04-23T16:37:11.912Z |
| Last modified | 2024-03-08T02:42:02.938Z |
| Snyk Advisor Score |  |
README.md
# lodash v4.17.21The Lodash library exported as Node.js modules.
Installation
Using npm:
$ npm i -g npm
$ npm i --save lodash
In Node.js:
// Load the full build.
var _ = require('lodash');
// Load the core build.
var _ = require('lodash/core');
// Load the FP build for immutable auto-curried iteratee-first data-last methods.
var fp = require('lodash/fp');

// Load method categories.
var array = require('lodash/array');
var object = require('lodash/fp/object');

// Cherry-pick methods for smaller browserify/rollup/webpack bundles.
var at = require('lodash/at');
var curryN = require('lodash/fp/curryN');
See the package source for more details.
Note:
Install n_ for Lodash use in the Node.js < 6 REPL.
Support
Tested in Chrome 74-75, Firefox 66-67, IE 11, Edge 18, Safari 11-12, & Node.js 8-12.
Automated browser & CI test runs are available.
package-json
| Description | Get metadata of a package from the npm registry |
| License | MIT |
| Created on | 2014-06-15T17:37:21.782Z |
| Last modified | 2024-02-25T03:16:59.744Z |
| Snyk Advisor Score |  |
README.md
# package-jsonGet metadata of a package from the npm registry
Install
npm install package-jsonUsage
import packageJson from 'package-json';

console.log(await packageJson('ava'));
//=> {name: 'ava', …}

// Also works with scoped packages
console.log(await packageJson('@sindresorhus/df'));
API
packageJson(packageName, options?)
packageName
Type: string
Name of the package.
options
Type: object
version
Type: string
Default: latest
Package version such as 1.0.0 or a dist tag such as latest.
The version can also be in any format supported by the semver module. For example:
1- Get the latest1.x.x1.2- Get the latest1.2.x^1.2.3- Get the latest1.x.xbut at least1.2.3~1.2.3- Get the latest1.2.xbut at least1.2.3
fullMetadata
Type: boolean
Default: false
By default, only an abbreviated metadata object is returned for performance reasons. Read more, or see the type definitions.
allVersions
Type: boolean
Default: false
Return the main entry containing all versions.
registryUrl
Type: string
Default: Auto-detected
The registry URL is by default inferred from the npm defaults and .npmrc. This is beneficial as package-json and any project using it will work just like npm. This option is only intended for internal tools. You should not use this option in reusable packages. Prefer just using .npmrc whenever possible.
omitDeprecated
Type: boolean
Default: true
Whether or not to omit deprecated versions of a package.
If set, versions marked as deprecated on the registry are omitted from results. Providing a dist tag or a specific version will still return that version, even if it's deprecated. If no version can be found once deprecated versions are omitted, a VersionNotFoundError is thrown.
PackageNotFoundError
The error thrown when the given package name cannot be found.
VersionNotFoundError
The error thrown when the given package version cannot be found.
Authentication
Both public and private registries are supported, for both scoped and unscoped packages, as long as the registry uses either bearer tokens or basic authentication.
Proxies
Proxy support is not implemented in this package. If necessary, use a global agent that modifies fetch, which this package uses internally.
Support for this may come to Node.js in the future.
Related
- package-json-cli - CLI for this module
- latest-version - Get the latest version of an npm package
- pkg-versions - Get the version numbers of a package from the npm registry
- npm-keyword - Get a list of npm packages with a certain keyword
- npm-user - Get user info of an npm user
- npm-email - Get the email of an npm user
underscore
| Description | JavaScript's functional programming helper library. |
| License | MIT |
| Created on | 2011-01-09T19:04:10.529Z |
| Last modified | 2023-11-07T05:00:52.243Z |
| Snyk Advisor Score |  |
README.md
__ /\ \ __ __ __ ___ \_\ \ __ _ __ ____ ___ ___ _ __ __ /\_\ ____ /\ \/\ \ /' _ `\ /'_ \ /'__`\/\ __\/ ,__\ / ___\ / __`\/\ __\/'__`\ \/\ \ /',__\ \ \ \_\ \/\ \/\ \/\ \ \ \/\ __/\ \ \//\__, `\/\ \__//\ \ \ \ \ \//\ __/ __ \ \ \/\__, `\ \ \____/\ \_\ \_\ \___,_\ \____\\ \_\\/\____/\ \____\ \____/\ \_\\ \____\/\_\ _\ \ \/\____/ \/___/ \/_/\/_/\/__,_ /\/____/ \/_/ \/___/ \/____/\/___/ \/_/ \/____/\/_//\ \_\ \/___/ \ \____/ \/___/Underscore.js is a utility-belt library for JavaScript that provides
support for the usual functional suspects (each, map, reduce, filter...)
without extending any core JavaScript objects.
For Docs, License, Tests, and pre-packed downloads, see:
https://underscorejs.org
For support and questions, please consult
our security policy,
the gitter channel
or stackoverflow
Underscore is an open-sourced component of DocumentCloud:
https://github.com/documentcloud
Many thanks to our contributors:
https://github.com/jashkenas/underscore/contributors
You can support the project by donating on
Patreon.
Enterprise coverage is available as part of the
Tidelift Subscription.
This project adheres to a code of conduct. By participating, you are expected to uphold this code.
New devDevelopment
@types/jest
| Description | TypeScript definitions for jest |
| License | MIT |
| Created on | 2016-05-17T05:15:55.334Z |
| Last modified | 2024-03-11T10:27:13.863Z |
| Snyk Advisor Score | 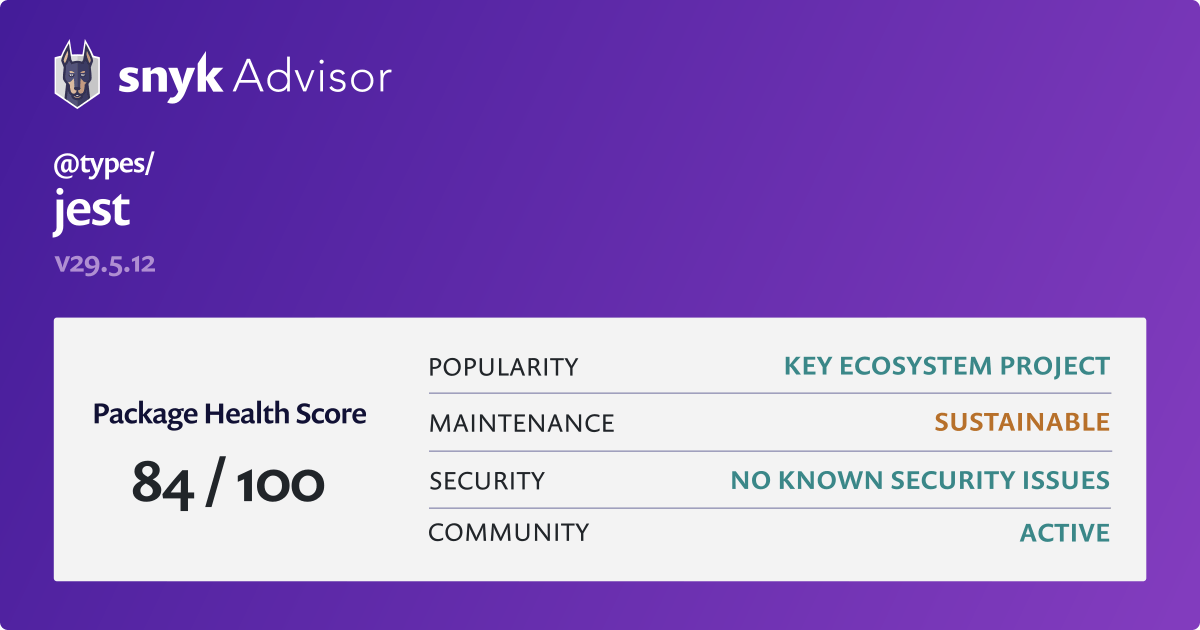 |
README.md
[object Object]@types/jsdom
| Description | TypeScript definitions for jsdom |
| License | MIT |
| Created on | 2016-05-17T05:24:36.982Z |
| Last modified | 2024-03-11T09:10:03.448Z |
| Snyk Advisor Score |  |
README.md
[object Object]@types/lodash
| Description | TypeScript definitions for lodash |
| License | MIT |
| Created on | 2016-05-17T05:32:21.382Z |
| Last modified | 2024-03-12T10:07:16.335Z |
| Snyk Advisor Score |  |
README.md
[object Object]@types/node
| Description | TypeScript definitions for node |
| License | MIT |
| Created on | 2016-05-17T18:26:38.670Z |
| Last modified | 2024-03-30T05:36:13.754Z |
| Snyk Advisor Score |  |
README.md
[object Object]@types/underscore
| Description | TypeScript definitions for underscore |
| License | MIT |
| Created on | 2016-05-17T19:09:14.994Z |
| Last modified | 2024-03-11T10:17:17.947Z |
| Snyk Advisor Score | 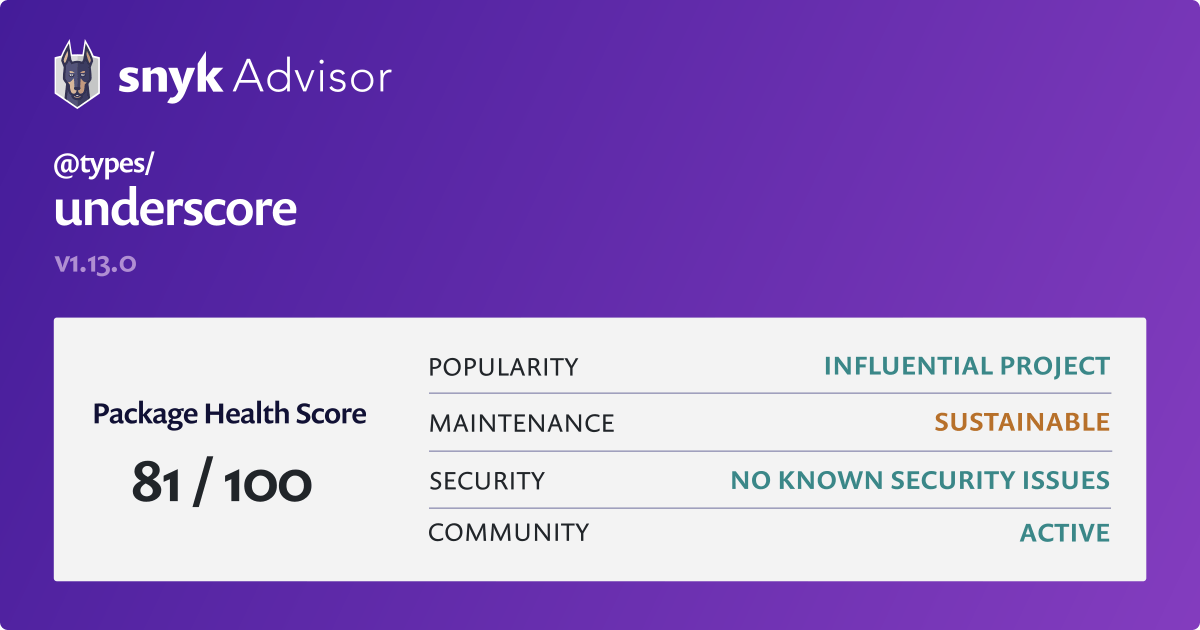 |
README.md
[object Object]@typescript-eslint/eslint-plugin
| Description | TypeScript plugin for ESLint |
| License | MIT |
| Created on | 2019-01-19T17:13:21.414Z |
| Last modified | 2024-03-28T09:56:21.574Z |
| Snyk Advisor Score | 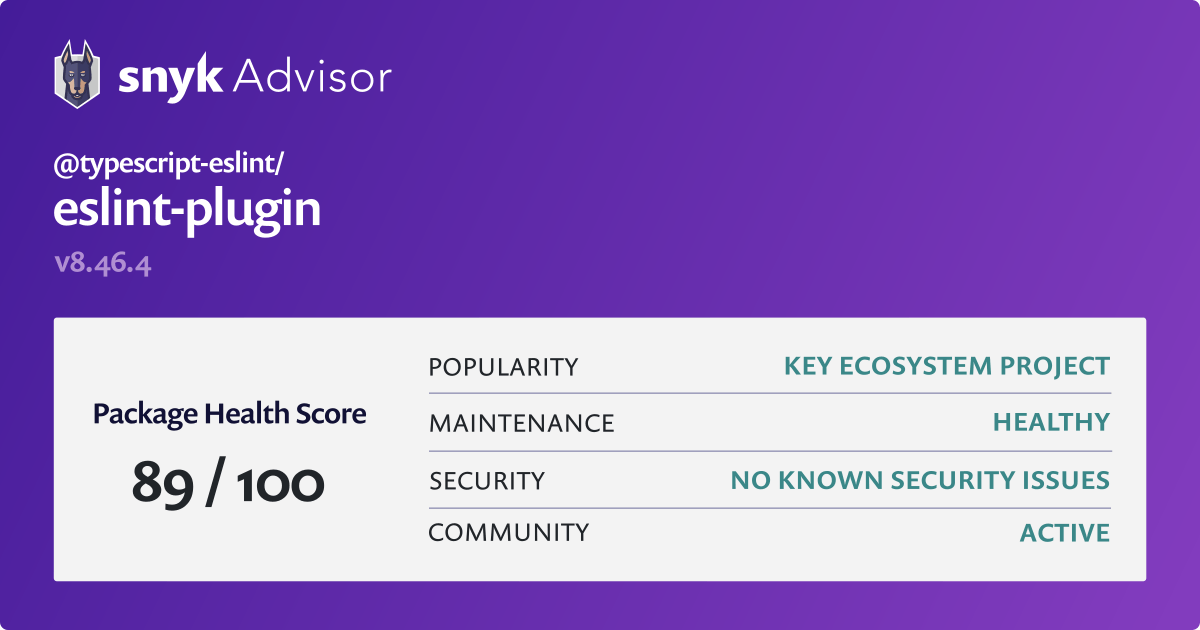 |
@typescript-eslint/parser
| Description | An ESLint custom parser which leverages TypeScript ESTree |
| License | BSD-2-Clause |
| Created on | 2019-01-19T17:13:21.526Z |
| Last modified | 2024-03-28T09:55:39.087Z |
| Snyk Advisor Score |  |
@vercel/ncc
README.md
# nccSimple CLI for compiling a Node.js module into a single file,
together with all its dependencies, gcc-style.
Motivation
- Publish minimal packages to npm
- Only ship relevant app code to serverless environments
- Don't waste time configuring bundlers
- Generally faster bootup time and less I/O overhead
- Compiled language-like experience (e.g.:
go)
Design goals
- Zero configuration
- TypeScript built-in
- Only supports Node.js programs as input / output
- Support all Node.js patterns and npm modules
Usage
Installation
npm i -g @vercel/nccUsage
$ ncc <cmd> <opts>Eg:
$ ncc build input.js -o distIf building an .mjs or .js module inside a "type": "module" package boundary, an ES module output will be created automatically.
Outputs the Node.js compact build of input.js into dist/index.js.
Note: If the input file is using a
.cjsextension, then so will the corresponding output file.
This is useful for packages that want to use.jsfiles as modules in native Node.js using
a"type": "module"in the package.json file.
Commands:
  build <input-file> [opts]
  run <input-file> [opts]
  cache clean|dir|size
  help
  version
Options:
  -o, --out [dir]          Output directory for build (defaults to dist)
  -m, --minify             Minify output
  -C, --no-cache           Skip build cache population
  -s, --source-map         Generate source map
  -a, --asset-builds       Build nested JS assets recursively, useful for
                           when code is loaded as an asset eg for workers.
  --no-source-map-register Skip source-map-register source map support
  -e, --external [mod]     Skip bundling 'mod'. Can be used many times
  -q, --quiet              Disable build summaries / non-error outputs
  -w, --watch              Start a watched build
  -t, --transpile-only     Use transpileOnly option with the ts-loader
  --v8-cache               Emit a build using the v8 compile cache
  --license [file]         Adds a file containing licensing information to the output
  --stats-out [file]       Emit webpack stats as json to the specified output file
  --target [es]            ECMAScript target to use for output (default: es2015)
                           Learn more: https://webpack.js.org/configuration/target
  -d, --debug              Show debug logs
Execution Testing
For testing and debugging, a file can be built into a temporary directory and executed with full source maps support with the command:
$ ncc run input.jsWith TypeScript
The only requirement is to point ncc to .ts or .tsx files. A tsconfig.json
file is necessary. Most likely you want to indicate es2015 support:
{
  "compilerOptions": {
    "target": "es2015",
    "moduleResolution": "node"
  }
}
If typescript is found in devDependencies, that version will be used.
Package Support
Some packages may need some extra options for ncc support in order to better work with the static analysis.
See package-support.md for some common packages and their usage with ncc.
Programmatically From Node.js
require('@vercel/ncc')('/path/to/input', {
  // provide a custom cache path or disable caching
  cache: "./custom/cache/path" | false,
  // externals to leave as requires of the build
  externals: ["externalpackage"],
  // directory outside of which never to emit assets
  filterAssetBase: process.cwd(), // default
  minify: false, // default
  sourceMap: false, // default
  assetBuilds: false, // default
  sourceMapBasePrefix: '../', // default treats sources as output-relative
  // when outputting a sourcemap, automatically include
  // source-map-support in the output file (increases output by 32kB).
  sourceMapRegister: true, // default
  watch: false, // default
  license: '', // default does not generate a license file
  target: 'es2015', // default
  v8cache: false, // default
  quiet: false, // default
  debugLog: false // default
}).then(({ code, map, assets }) => {
  console.log(code);
  // Assets is an object of asset file names to { source, permissions, symlinks }
  // expected relative to the output code (if any)
})
When watch: true is set, the build object is not a promise, but has the following signature:
{
  // handler re-run on each build completion
  // watch errors are reported on "err"
  handler (({ err, code, map, assets }) => { ... })
  // handler re-run on each rebuild start
  rebuild (() => {})
  // close the watcher
  void close ();
}
Caveats
- Files / assets are relocated based on a static evaluator. Dynamic non-statically analyzable asset loads may not work out correctly
commitlint
| Description | Lint your commit messages |
| License | MIT |
| Created on | 2017-10-14T09:41:14.660Z |
| Last modified | 2024-03-19T02:24:03.966Z |
| Snyk Advisor Score |  |
README.md
# commitlintAlias of @commitlint/cli
eslint
| Description | An AST-based pattern checker for JavaScript. |
| License | MIT |
| Created on | 2013-07-04T17:01:29.347Z |
| Last modified | 2024-03-29T20:45:00.948Z |
| Snyk Advisor Score |  |
eslint-plugin-jest
| Description | ESLint rules for Jest |
| License | MIT |
| Created on | 2016-11-06T18:19:40.199Z |
| Last modified | 2024-03-29T22:22:37.659Z |
| Snyk Advisor Score |  |
eslint-plugin-prettier
| Description | Runs prettier as an eslint rule |
| License | MIT |
| Created on | 2017-01-26T04:15:55.798Z |
| Last modified | 2024-01-10T03:34:34.618Z |
| Snyk Advisor Score |  |
README.md
# eslint-plugin-prettier [](https://github.com/prettier/eslint-plugin-prettier/actions?query=workflow%3ACI+branch%3Amaster)Runs Prettier as an ESLint rule and reports differences as individual ESLint issues.
If your desired formatting does not match Prettier’s output, you should use a different tool such as prettier-eslint instead.
Please read Integrating with linters before installing.
TOC
- Sample
- Installation
- Configuration (legacy:
.eslintrc*) - Configuration (new:
eslint.config.js) Sveltesupportarrow-body-styleandprefer-arrow-callbackissue- Options
- Sponsors
- Backers
- Contributing
- Changelog
- License
Sample
error: Insert `,` (prettier/prettier) at pkg/commons-atom/ActiveEditorRegistry.js:22:25:
  20 | import {
  21 |   observeActiveEditorsDebounced,
> 22 |   editorChangesDebounced
     |                         ^
  23 | } from './debounced';;
  24 |
  25 | import {observableFromSubscribeFunction} from '../commons-node/event';


error: Delete `;` (prettier/prettier) at pkg/commons-atom/ActiveEditorRegistry.js:23:21:
  21 |   observeActiveEditorsDebounced,
  22 |   editorChangesDebounced
> 23 | } from './debounced';;
     |                     ^
  24 |
  25 | import {observableFromSubscribeFunction} from '../commons-node/event';
  26 | import {cacheWhileSubscribed} from '../commons-node/observable';


2 errors found.
./node_modules/.bin/eslint --format codeframe pkg/commons-atom/ActiveEditorRegistry.js(code from nuclide).
Installation
npm install --save-dev eslint-plugin-prettier eslint-config-prettier
npm install --save-dev --save-exact prettier
eslint-plugin-prettier does not install Prettier or ESLint for you. You must install these yourself.
This plugin works best if you disable all other ESLint rules relating to code formatting, and only enable rules that detect potential bugs. If another active ESLint rule disagrees with prettier about how code should be formatted, it will be impossible to avoid lint errors. Our recommended configuration automatically enables eslint-config-prettier to disable all formatting-related ESLint rules.
Configuration (legacy: .eslintrc*)
For legacy configuration, this plugin ships with a plugin:prettier/recommended config that sets up both eslint-plugin-prettier and eslint-config-prettier in one go.
Add plugin:prettier/recommended as the last item in the extends array in your .eslintrc* config file, so that eslint-config-prettier has the opportunity to override other configs:
{
  "extends": ["plugin:prettier/recommended"]
}
This will:
- Enable the
prettier/prettierrule. - Disable the
arrow-body-styleandprefer-arrow-callbackrules which are problematic with this plugin - see the below for why. - Enable the
eslint-config-prettierconfig which will turn off ESLint rules that conflict with Prettier.
Configuration (new: eslint.config.js)
For flat configuration, this plugin ships with an eslint-plugin-prettier/recommended config that sets up both eslint-plugin-prettier and eslint-config-prettier in one go.
Import eslint-plugin-prettier/recommended and add it as the last item in the configuration array in your eslint.config.js file so that eslint-config-prettier has the opportunity to override other configs:
const eslintPluginPrettierRecommended = require('eslint-plugin-prettier/recommended');

module.exports = [
  // Any other config imports go at the top
  eslintPluginPrettierRecommended,
];
This will:
- Enable the
prettier/prettierrule. - Disable the
arrow-body-styleandprefer-arrow-callbackrules which are problematic with this plugin - see the below for why. - Enable the
eslint-config-prettierconfig which will turn off ESLint rules that conflict with Prettier.
Svelte support
We recommend to use eslint-plugin-svelte instead of eslint-plugin-svelte3 because eslint-plugin-svelte has a correct eslint-svelte-parser instead of hacking.
When use with eslint-plugin-svelte3, eslint-plugin-prettier will just ignore the text passed by eslint-plugin-svelte3, because the text has been modified.
If you still decide to use eslint-plugin-svelte3, you'll need to run prettier --write *.svelte manually.
arrow-body-style and prefer-arrow-callback issue
If you use arrow-body-style or prefer-arrow-callback together with the prettier/prettier rule from this plugin, you can in some cases end up with invalid code due to a bug in ESLint’s autofix – see issue #65.
For this reason, it’s recommended to turn off these rules. The plugin:prettier/recommended config does that for you.
You can still use these rules together with this plugin if you want, because the bug does not occur all the time. But if you do, you need to keep in mind that you might end up with invalid code, where you manually have to insert a missing closing parenthesis to get going again.
If you’re fixing large of amounts of previously unformatted code, consider temporarily disabling the prettier/prettier rule and running eslint --fix and prettier --write separately.
Options
Note: While it is possible to pass options to Prettier via your ESLint configuration file, it is not recommended because editor extensions such as
prettier-atomandprettier-vscodewill read.prettierrc, but won't read settings from ESLint, which can lead to an inconsistent experience.
-
The first option:
-
An object representing options that will be passed into prettier. Example:
{
  "prettier/prettier": [
    "error",
    {
      "singleQuote": true,
      "parser": "flow"
    }
  ]
}
NB: This option will merge and override any config set with
.prettierrcfiles
-
-
The second option:
-
An object with the following options
-
usePrettierrc: Enables loading of the Prettier configuration file, (default:true). May be useful if you are using multiple tools that conflict with each other, or do not wish to mix your ESLint settings with your Prettier configuration. And also, it is possible to run prettier without loading the prettierrc config file via the CLI's --no-config option or through the API by calling prettier.format() without passing through the options generated by calling resolveConfig.{ "prettier/prettier": [ "error", {}, { "usePrettierrc": false } ] } -
fileInfoOptions: Options that are passed to prettier.getFileInfo to decide whether a file needs to be formatted. Can be used for example to opt-out from ignoring files located innode_modulesdirectories.{ "prettier/prettier": [ "error", {}, { "fileInfoOptions": { "withNodeModules": true } } ] }
-
-
-
The rule is auto fixable -- if you run
eslintwith the--fixflag, your code will be formatted according toprettierstyle.
Sponsors
| @prettier/plugin-eslint | eslint-config-prettier | eslint-plugin-prettier | prettier-eslint | prettier-eslint-cli |
|---|---|---|---|---|
Backers
| @prettier/plugin-eslint | eslint-config-prettier | eslint-plugin-prettier | prettier-eslint | prettier-eslint-cli |
|---|---|---|---|---|
Contributing
See CONTRIBUTING.md
Changelog
Detailed changes for each release are documented in CHANGELOG.md.
License
jest
| Description | Delightful JavaScript Testing. |
| License | MIT |
| Created on | 2012-02-22T15:25:44.365Z |
| Last modified | 2024-02-26T15:59:15.885Z |
| Snyk Advisor Score |  |
jest-circus
js-yaml
| Description | YAML 1.2 parser and serializer |
| License | MIT |
| Created on | 2011-11-02T01:56:02.870Z |
| Last modified | 2023-06-09T21:33:18.974Z |
| Snyk Advisor Score | 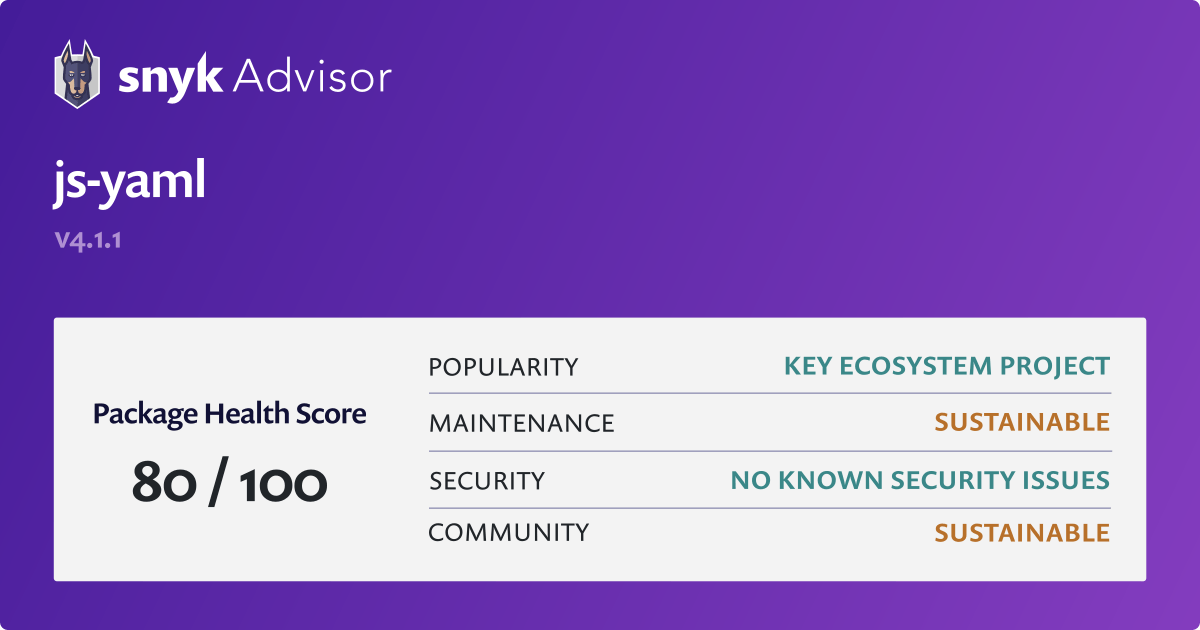 |
README.md
JS-YAML - YAML 1.2 parser / writer for JavaScript =================================================This is an implementation of YAML, a human-friendly data
serialization language. Started as PyYAML port, it was
completely rewritten from scratch. Now it's very fast, and supports 1.2 spec.
Installation
YAML module for node.js
npm install js-yaml
CLI executable
If you want to inspect your YAML files from CLI, install js-yaml globally:
npm install -g js-yaml
Usage
usage: js-yaml [-h] [-v] [-c] [-t] file

Positional arguments:
  file           File with YAML document(s)

Optional arguments:
  -h, --help     Show this help message and exit.
  -v, --version  Show program's version number and exit.
  -c, --compact  Display errors in compact mode
  -t, --trace    Show stack trace on error
API
Here we cover the most 'useful' methods. If you need advanced details (creating
your own tags), see examples
for more info.
const yaml = require('js-yaml');
const fs   = require('fs');

// Get document, or throw exception on error
try {
  const doc = yaml.load(fs.readFileSync('/home/ixti/example.yml', 'utf8'));
  console.log(doc);
} catch (e) {
  console.log(e);
}
load (string [ , options ])
Parses string as single YAML document. Returns either a
plain object, a string, a number, null or undefined, or throws YAMLException on error. By default, does
not support regexps, functions and undefined.
options:
filename(default: null) - string to be used as a file path in
error/warning messages.onWarning(default: null) - function to call on warning messages.
Loader will call this function with an instance ofYAMLExceptionfor each warning.schema(default:DEFAULT_SCHEMA) - specifies a schema to use.FAILSAFE_SCHEMA- only strings, arrays and plain objects:
http://www.yaml.org/spec/1.2/spec.html#id2802346JSON_SCHEMA- all JSON-supported types:
http://www.yaml.org/spec/1.2/spec.html#id2803231CORE_SCHEMA- same asJSON_SCHEMA:
http://www.yaml.org/spec/1.2/spec.html#id2804923DEFAULT_SCHEMA- all supported YAML types.
json(default: false) - compatibility with JSON.parse behaviour. If true, then duplicate keys in a mapping will override values rather than throwing an error.
NOTE: This function does not understand multi-document sources, it throws
exception on those.
NOTE: JS-YAML does not support schema-specific tag resolution restrictions.
So, the JSON schema is not as strictly defined in the YAML specification.
It allows numbers in any notation, use Null and NULL as null, etc.
The core schema also has no such restrictions. It allows binary notation for integers.
loadAll (string [, iterator] [, options ])
Same as load(), but understands multi-document sources. Applies
iterator to each document if specified, or returns array of documents.
const yaml = require('js-yaml');

yaml.loadAll(data, function (doc) {
  console.log(doc);
});
dump (object [ , options ])
Serializes object as a YAML document. Uses DEFAULT_SCHEMA, so it will
throw an exception if you try to dump regexps or functions. However, you can
disable exceptions by setting the skipInvalid option to true.
options:
indent(default: 2) - indentation width to use (in spaces).noArrayIndent(default: false) - when true, will not add an indentation level to array elementsskipInvalid(default: false) - do not throw on invalid types (like function
in the safe schema) and skip pairs and single values with such types.flowLevel(default: -1) - specifies level of nesting, when to switch from
block to flow style for collections. -1 means block style everwherestyles- "tag" => "style" map. Each tag may have own set of styles.schema(default:DEFAULT_SCHEMA) specifies a schema to use.sortKeys(default:false) - iftrue, sort keys when dumping YAML. If a
function, use the function to sort the keys.lineWidth(default:80) - set max line width. Set-1for unlimited width.noRefs(default:false) - iftrue, don't convert duplicate objects into referencesnoCompatMode(default:false) - iftruedon't try to be compatible with older
yaml versions. Currently: don't quote "yes", "no" and so on, as required for YAML 1.1condenseFlow(default:false) - iftrueflow sequences will be condensed, omitting the space betweena, b. Eg.'[a,b]', and omitting the space betweenkey: valueand quoting the key. Eg.'{"a":b}'Can be useful when using yaml for pretty URL query params as spaces are %-encoded.quotingType('or", default:') - strings will be quoted using this quoting style. If you specify single quotes, double quotes will still be used for non-printable characters.forceQuotes(default:false) - iftrue, all non-key strings will be quoted even if they normally don't need to.replacer- callbackfunction (key, value)called recursively on each key/value in source object (seereplacerdocs forJSON.stringify).
The following table show availlable styles (e.g. "canonical",
"binary"...) available for each tag (.e.g. !!null, !!int ...). Yaml
output is shown on the right side after => (default setting) or ->:
!!null
  "canonical"   -> "~"
  "lowercase"   => "null"
  "uppercase"   -> "NULL"
  "camelcase"   -> "Null"

!!int
  "binary"      -> "0b1", "0b101010", "0b1110001111010"
  "octal"       -> "0o1", "0o52", "0o16172"
  "decimal"     => "1", "42", "7290"
  "hexadecimal" -> "0x1", "0x2A", "0x1C7A"

!!bool
  "lowercase"   => "true", "false"
  "uppercase"   -> "TRUE", "FALSE"
  "camelcase"   -> "True", "False"

!!float
  "lowercase"   => ".nan", '.inf'
  "uppercase"   -> ".NAN", '.INF'
  "camelcase"   -> ".NaN", '.Inf'
Example:
dump(object, {
  'styles': {
    '!!null': 'canonical' // dump null as ~
  },
  'sortKeys': true        // sort object keys
});
Supported YAML types
The list of standard YAML tags and corresponding JavaScript types. See also
YAML tag discussion and
YAML types repository.
!!null ''                   # null
!!bool 'yes'                # bool
!!int '3...'                # number
!!float '3.14...'           # number
!!binary '...base64...'     # buffer
!!timestamp 'YYYY-...'      # date
!!omap [ ... ]              # array of key-value pairs
!!pairs [ ... ]             # array or array pairs
!!set { ... }               # array of objects with given keys and null values
!!str '...'                 # string
!!seq [ ... ]               # array
!!map { ... }               # object
JavaScript-specific tags
See js-yaml-js-types for
extra types.
Caveats
Note, that you use arrays or objects as key in JS-YAML. JS does not allow objects
or arrays as keys, and stringifies (by calling toString() method) them at the
moment of adding them.
---
? [ foo, bar ]
: - baz
? { foo: bar }
: - baz
  - baz
{ "foo,bar": ["baz"], "[object Object]": ["baz", "baz"] }Also, reading of properties on implicit block mapping keys is not supported yet.
So, the following YAML document cannot be loaded.
&anchor foo:
  foo: bar
  *anchor: duplicate key
  baz: bat
  *anchor: duplicate key
js-yaml for enterprise
Available as part of the Tidelift Subscription
The maintainers of js-yaml and thousands of other packages are working with Tidelift to deliver commercial support and maintenance for the open source dependencies you use to build your applications. Save time, reduce risk, and improve code health, while paying the maintainers of the exact dependencies you use. Learn more.
prettier
| Description | Prettier is an opinionated code formatter |
| License | MIT |
| Created on | 2017-01-10T03:45:38.963Z |
| Last modified | 2024-02-25T15:54:08.863Z |
| Snyk Advisor Score |  |
README.md
[](https://prettier.io)Opinionated Code Formatter
JavaScript
· TypeScript
· Flow
· JSX
· JSON
CSS
· SCSS
· Less
HTML
· Vue
· Angular
GraphQL
· Markdown
· YAML
Your favorite language?
Intro
Prettier is an opinionated code formatter. It enforces a consistent style by parsing your code and re-printing it with its own rules that take the maximum line length into account, wrapping code when necessary.
Input
foo(reallyLongArg(), omgSoManyParameters(), IShouldRefactorThis(), isThereSeriouslyAnotherOne());Output
foo(
  reallyLongArg(),
  omgSoManyParameters(),
  IShouldRefactorThis(),
  isThereSeriouslyAnotherOne(),
);
Prettier can be run in your editor on-save, in a pre-commit hook, or in CI environments to ensure your codebase has a consistent style without devs ever having to post a nit-picky comment on a code review ever again!
Badge
Show the world you're using Prettier →
[](https://github.com/prettier/prettier)Contributing
See CONTRIBUTING.md.
ts-jest
README.md
ts-jest
A Jest transformer with source map support that lets you use Jest to test projects written in TypeScript.
It supports all features of TypeScript including type-checking. Read more about Babel7 + preset-typescript vs TypeScript (and ts-jest).
We are not doing semantic versioning and 23.10 is a re-write, run npm i -D ts-jest@"<23.10.0" to go back to the previous version |
|---|
![]() View the online documentation (usage & technical)
View the online documentation (usage & technical)
Ask for some help in the
Jest Discord community or ts-jest GitHub Discussion
![]() Before reporting any issues, be sure to check the troubleshooting page
Before reporting any issues, be sure to check the troubleshooting page
![]() We're looking for collaborators! Want to help improve
We're looking for collaborators! Want to help improve ts-jest?
Getting Started
These instructions will get you setup to use ts-jest in your project. For more detailed documentation, please check online documentation.
| using npm | using yarn | |
|---|---|---|
| Prerequisites | npm i -D jest typescript |
yarn add --dev jest typescript |
| Installing | npm i -D ts-jest @types/jest |
yarn add --dev ts-jest @types/jest |
| Creating config | npx ts-jest config:init |
yarn ts-jest config:init |
| Running tests | npm test or npx jest |
yarn test or yarn jest |
Built With
- TypeScript - JavaScript that scales
- Jest - Delightful JavaScript Testing
ts-jest- Jest transformer for TypeScript (yes,ts-jestuses itself for its tests)
Contributing
Please read CONTRIBUTING.md for details on our code of conduct, and the process for submitting pull requests to us.
Versioning
We DO NOT use SemVer for versioning. Though you can think about SemVer when reading our version, except our major number follows the one of Jest. For the versions available, see the tags on this repository.
Authors/maintainers
- Kulshekhar Kabra - kulshekhar
- Gustav Wengel - GeeWee
- Ahn - ahnpnl
- Huafu Gandon - huafu
See also the list of contributors who participated in this project.
Supporters
- JetBrains has been kind enough to support ts-jest with an open source license.
License
This project is licensed under the MIT License - see the LICENSE.md file for details
typescript
| Description | TypeScript is a language for application scale JavaScript development |
| License | Apache-2.0 |
| Created on | 2012-10-01T15:35:39.553Z |
| Last modified | 2024-03-30T07:12:05.100Z |
| Snyk Advisor Score |  |
b2c4dbe to
44b4ddb
Compare
44b4ddb to
352b5dd
Compare









No description provided.