-
Notifications
You must be signed in to change notification settings - Fork 8
Home
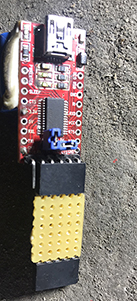
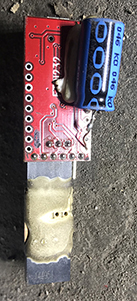
MeterLogger for Kamstrup meters are programmed with a standard FT232RL FTDI USB to TTL serial adapter also used for Arduino. DTR pin is left unconnected. Here shown with a male-to-female adapter and a cap connected to the 3.3 V supply to help supplying power for the MeterLogger when programming the flash:


It can be ordered from Banggood or AliExpress
MeterLogger is running at 3.3 V, so remember to configure the adapter for 3.3 V!
Schematic and PCB images can be found here
Given the serial programmer is connected to /dev/ttyUSB0, run:
git clone https://github.com/nabovarme/MeterLogger.git
cd MeterLogger
sudo docker build -t meterlogger:latest .
docker run -t -i --device=/dev/ttyUSB0 -v `pwd`:/meterlogger/MeterLogger meterlogger:latest /bin/bash
perl -e 'print map(chr(int rand(256)), 1..16)'|xxd -g 16
and copy the generated key (ef500c9268cf749016d26d6cbfaaf7bf)
in mysql client run:
insert into `meters` (`serial`, `key`) values ('9999999', 'ef500c9268cf749016d26d6cbfaaf7bf');
Put jumper on pins marked 'PRG' and connect the serial programmer to the MeterLogger


Run the following to clean, build and flash:
AP=1 NO_CRON=1 SERIAL=SERIAL=9999999 KEY=ef500c9268cf749016d26d6cbfaaf7bf make clean all flashall
Power on the meter with the MeterLogger installed and wait for the wireless network named KAM_<serial> to appear. Connect to the network with the 16 first characters from the key as password.
The configuration webpage should now appear and MeterLogger can now be configured in a time window of 2 minutes.
For MeterLogger's in Kamstrup meters only the wireless network and password is needed to configure.
For impulse based loggers also the serial number, pulses/kWh and start reading is needed.