-
-
Notifications
You must be signed in to change notification settings - Fork 356
How to Maintain a RockWeb Plugin Environment with a fork
If you are Plugin Developer and are comfortable with github, this doc is for you!
First, you need have a GitHub account. You'll need this so we have a place to fork the https://github.com/SparkDevNetwork/Rock repository to. For the purposes of this doc, let's assume you are going to use a personal github account called https://github.com/yourname/ .
Now that you have a github account, let's Fork https://github.com/SparkDevNetwork/Rock.
- Login in to github with your 'yourname' github account, then go to https://github.com/SparkDevNetwork/Rock
- Find the button that says "Fork" and click it. Almost immediately after you click it, you'll have a fork at https://github.com/yourname/Rock
It almost seems too easy, doesn't it. So, why did we do that and what are each of these for?
-
https://github.com/SparkDevNetwork/Rock
- We won't be committing or pushing any changes to this Repository, but we will pull and merge updates from this repository into our fork from time to time. We'll get into the details of how to do this later in this doc.
-
https://github.com/yourname/Rock
- This is our fork of the Rock repository. This is where we will be creating new plugins, blocks, themes, etc. You probably won't be changing any core code though (but you will have full access to it).
Use SmartGit
Create a local clone of https://github.com/yourname/Rock
- Select File | Clone
-

- Paste the https clone url (
https://github.com/yourname/Rock.git) into the Repository URL edit box -
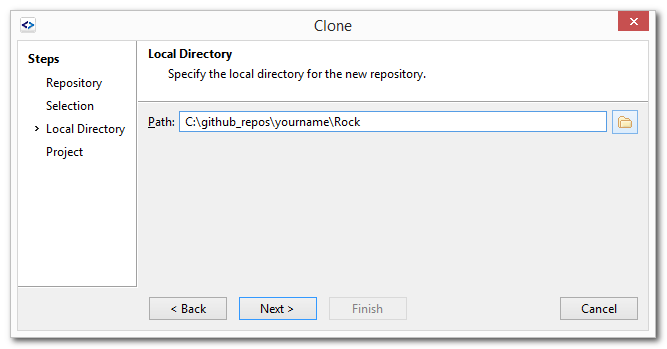
- Press Next until you get to where you specify the Local Directory Path. Choose
c:\github\yourname\Rockand press Next -
- When prompted to 'Open in new project', choose
Rock-yournameas the Project Name. Adding -yourname to the end is important (it'll prevent some confusion later) -
- Finish (this might take a while)
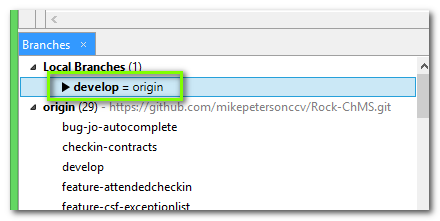
Now, look in 'Branches' | 'Local Branches', make sure you have a 'develop' branch. It should look like this:

SmartGit might have automatically did this already for you, but if it didn't, do the following
- In 'Branches', right click on origin\develop and select 'switch branch'
-

- Choose 'create local branch:' name it 'develop', and enable 'Track remote branch'.
-

- Click switch
Pull from 'origin (https://github.com/yourname/Rock.git)'
With 'develop' as your active branch, Click 'Pull'. This will get the most recent version of 'origin\develop' from your Rock fork.
Add the upstream repository (https://github.com/SparkDevNetwork/Rock.git)
- Select Remote | Add..
- Set the 'Url or Path:' to
https://github.com/SparkDevNetwork/Rock.git - Set 'Name:' to
upstream-
- Click Add
- In 'Branches', right click on
upstreamand select 'pull' - Make sure 'Fetch From' says 'upstream (https://github.com/SparkDevNetwork/Rock.git)' then click 'Fetch Only'
- In 'Branches', right click on
upstream\develop, choose 'Merge...' - - then choose 'Merge to Working Tree'
-
- If there are any changes, review them, then click Commit, then Push
Pretty easy, right?
First, we want to create our own Rock-yourname.sln file by renaming the Rock.sln
- Using Visual Studio, open
c:\github\yourname\Rock\Rock.sln - In Solution Explorer, select Solution 'Rock'
- Click File | Save As, and save it as
c:\github\yourname\Rock\Rock-yourname.sln
Now, from now on, open your 'Rock-yourname.sln' instead of 'Rock.sln' (it'll get confusing if you don't)
If you're plugin requires that you write your own .dll, go ahead and add those projects to your 'Rock-yourname.sln'. Name them using the Rock naming conventions. For example, 'com.yourdomain.PotluckDinner'
Create your custom Rock blocks in RockWeb\Plugins\com_yourdomain...
Now that you have your own fork, you can commit and push all of your changes up to your github fork (https://github.com/yourname/Rock). Typically, the only stuff you would be changing is in your Plugin-Projects, RockWeb\Plugins, and maybe Themes.
That's about it! Now that you are set up, you'll mainly be doing this from day to day
In the `develop' branch
- Pull/Fetch from
upstream - Merge from
upstream\developintoLocal\develop - Code your Plugin Projects and Blocks
- Commit/Push to
origin
Note, if you are developing your plugin/block for a specific release of Rock vs just the latest from develop, the above instructions are pretty similar. Just work in the release branch (for example, Release 1.2) instead of develop.