-
Notifications
You must be signed in to change notification settings - Fork 36
Torus LTI 1.3 Configuration
Torus supports LTI 1.3 integration and leverages the Learning Management System (LMS) for course delivery. The philosophy of Torus is to focus and excel at what it is specifically designed for, which is rich course content authoring, delivery and data-driven continuous improvement. Many of the necessary features of course delivery such as roster management, grade book management and scheduling are deferred to the LMS, which is what it is specifically designed for. These aspects of the student and instructor experience are crucial and require tight integration which is enabled by the LTI 1.3 standard.
Many LMSs currently support the LTI 1.3 standard including Canvas, Blackboard, Moodle, Brightspace D2L, and more. Each LMS may have a slightly different method of configuring an external tool like Torus, but in general the process is similar between them and is driven by the LTI 1.3 Specification.
Torus has the concept of an Institution which represents an organization whom wishes to use Torus, typically from their own self-hosted LMS or a cloud-hosted one. For example, Carnegie Mellon University would be considered an institution, and so is The Open Learning Initiative (OLI).
A Registration represents a configured LTI connection from an institution in Torus. Typically an institution will have a single registration but there may be certain cases where an institution has multiple registrations could be an institution that has multiple LMSs. Each one of these LMSs may belong to the same Institution but will have separate registrations. The combination of issuer (typically a URL e.g. https://canvas.oli.cmu.edu) and client_id represents a globally unique registration. The issuer represents the LTI Platform, not necessarily the institution. For example, https://canvas.instructure.com is the issuer that represents any institution who may be using Instructure's cloud platform and the client id represents the specific registration, and therefore institution.
A Deployment can be thought of as the next tier below registrations. A registration may have many deployments. For example, a Registration may have one deployment for every course, or a single deployment shared globally across the entire LMS.
There is some flexibility to how these concepts could be represented for an organization, but typically an organization will have a single Institution, with a single Registration for their LMS, and they may have one or many Deployments within their LMS depending on if the tool is configure globally or for an individual department/course.
Institutions, registrations and deployments are currently created and managed by a Torus administrator. In the future, we plan to add more flexibility on how these entities can be registered and approved. For now, please contact OLI if you wish to deliver a Torus course from your organization's LMS. If you are running your own instance of Torus, the steps below outline the process for creating these entities required for LTI 1.3 integration with an LMS.
To get connected with Torus, you must first configure your LMS LTI 1.3 connection. This process will vary depending on your institution's LMS, but the basic principles are the same. Refer to the specific instructions for your LMS in the Configuring LTI 1.3 in LMS section below. You will only have to perform this setup process once for your LMS.
After your LMS has been configured, you should be able to access Torus from your LMS. The first time you launch into Torus from your LMS, you will be presented with a "Register Your Institution" form. Please fill out this form and allow OLI up to 2 business days to review and approve your request.
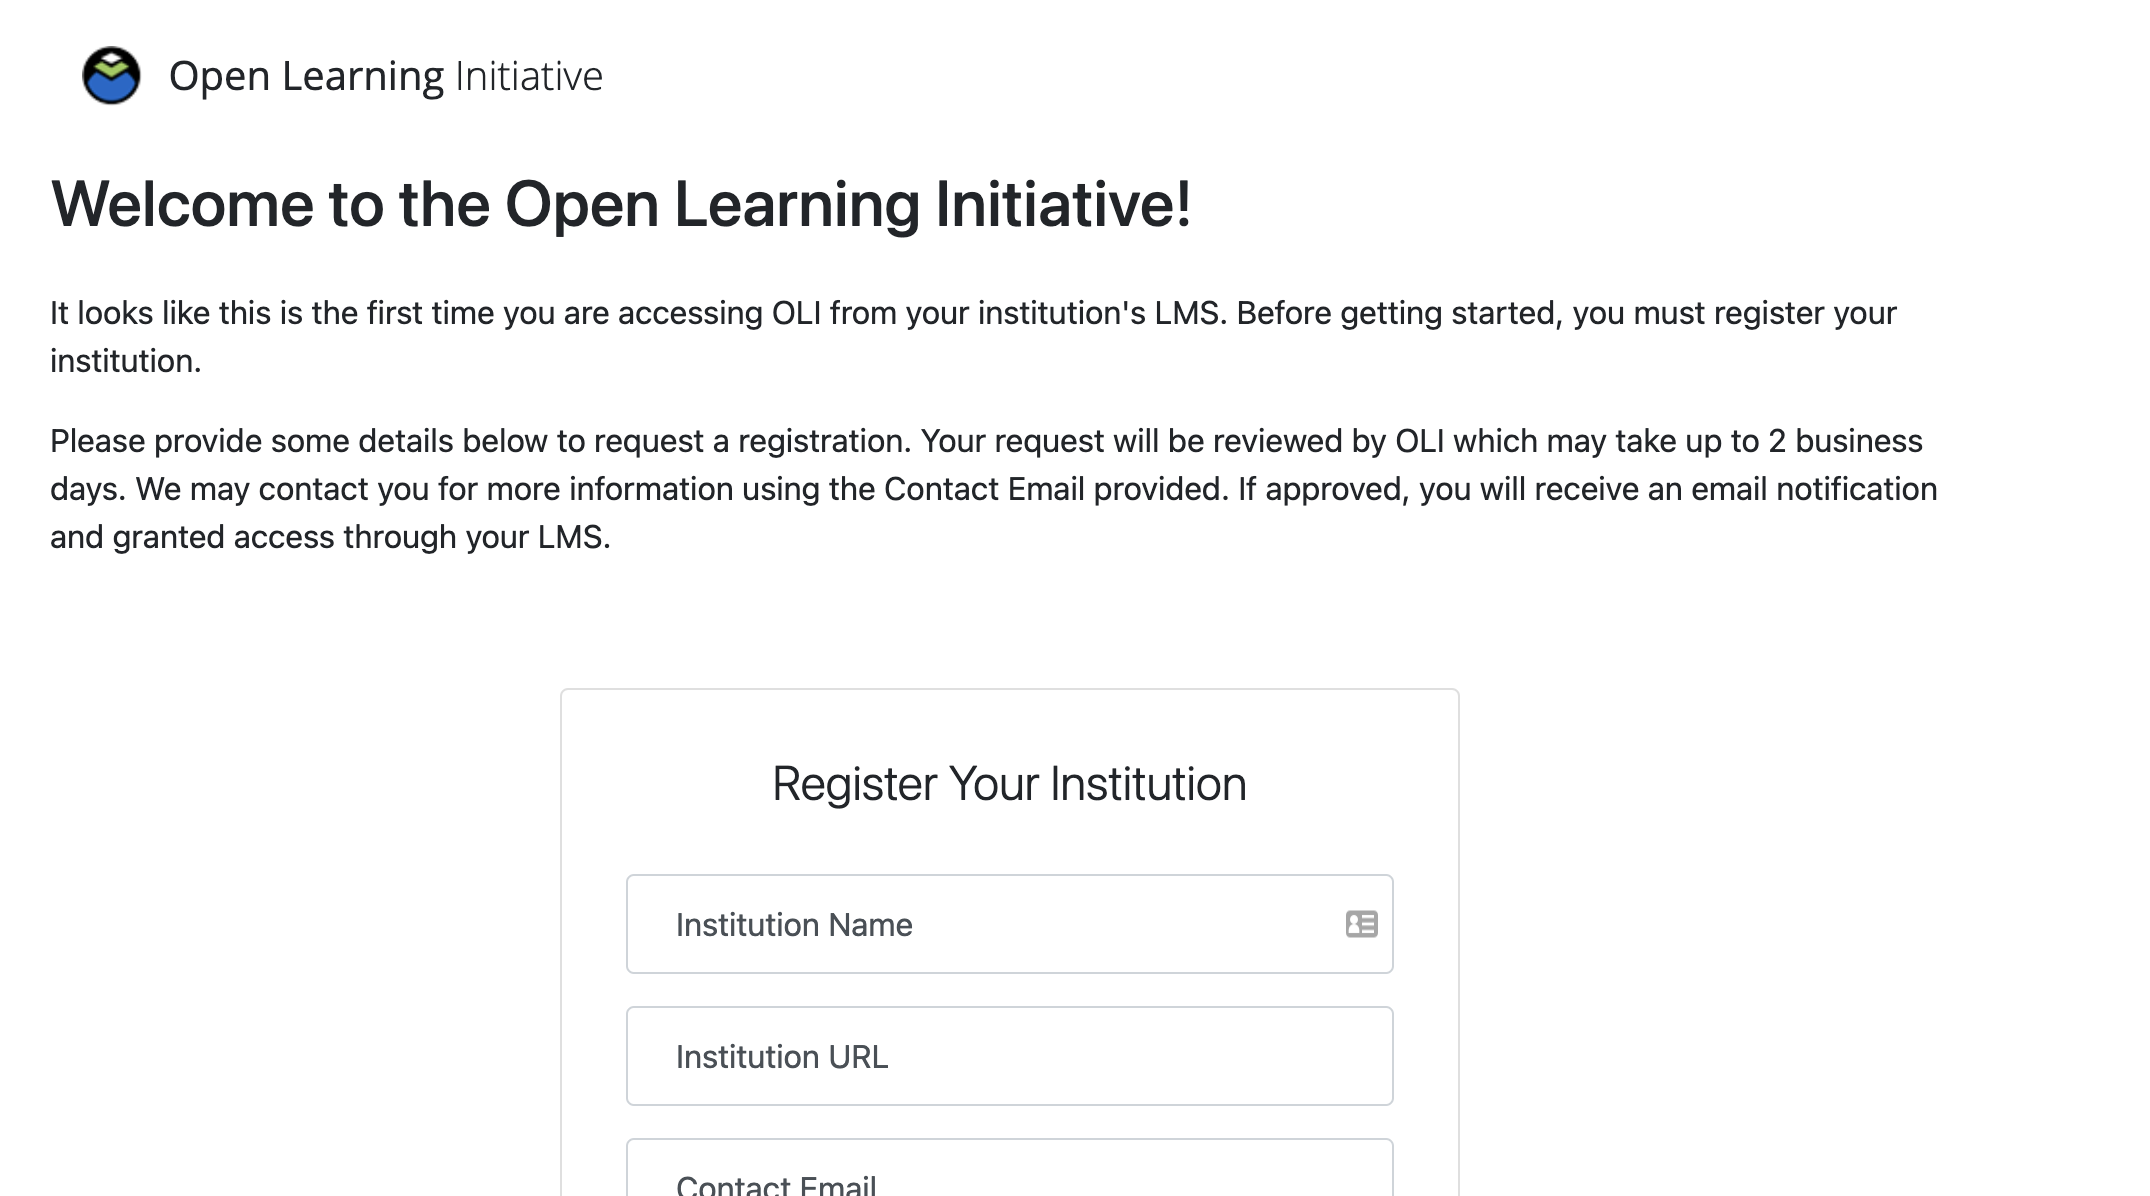
If your are running your own instance of Torus, your Torus admin will need to approve this request under Institutions > Pending Requests.
Once your request has been approved, you should now be able to access Torus from your LMS which will guide you through course setup.
Canvas Docs: https://community.canvaslms.com/t5/Admin-Guide/How-do-I-configure-an-LTI-key-for-an-account/ta-p/140
Canvas requires elevated privileges to configure LTI 1.3 Developer Keys and Apps. Canvas administrators should have the necessary privileges. If you don't see the options mentioned below, you may not have proper privileges or your canvas instance may be an older version which does not support LTI 1.3. In either case, you should check with your LMS administrator.
-
In Canvas using the left main menu, select Admin > [Admin Account Name].

Then click "Developer Keys" link

-
Under Developer Keys, click "+ Developer Key" > "+ LTI Key"

-
You have two options when configuring an LTI 1.3 Developer Key in Canvas:
-
OPTION 1 (Recommended) - Automatic Configuration using JSON URL
-
Select Enter URL for the method
-
Configure the following fields with values that correspond to your torus deployment. For example, if you are hosting torus at a specific domain or in a development environment using a service such as ngrok, you will want to replace all instances of
proton.oli.cmu.eduwith your domain or ngrok address e.g.ba7c432acd17.ngrok.io.
- Redirect URIs: https://proton.oli.cmu.edu/lti/launch
- Developer Key JSON URL: https://proton.oli.cmu.edu/lti/developer_key.json

Click "Save"
-
-
OPTION 2 - Manual Entry
- Configure the following fields with values that correspond to your torus deployment. For example, if you are hosting torus at a specific domain or in a development environment using a service such as ngrok, you will want to replace all instances of
proton.oli.cmu.eduwith your domain or ngrok address e.g.ba7c432acd17.ngrok.io.
- Key Name: OLI Torus
- Owner Email: [email protected]
- Redirect URIs: https://proton.oli.cmu.edu/lti/launch
- Title: Torus
- Description: Create, deliver and iteratively improve course content with Torus, through the Open Learning Initiative
- Target Link URI: https://proton.oli.cmu.edu/lti/launch
- OpenID Connect Initiation Url: https://proton.oli.cmu.edu/lti/login
- JWK Method: Public JWK URL
- Public JWK URL: https://proton.oli.cmu.edu/.well-known/jwks.json
- Placements: Configure depending on your needs, or leave defaults
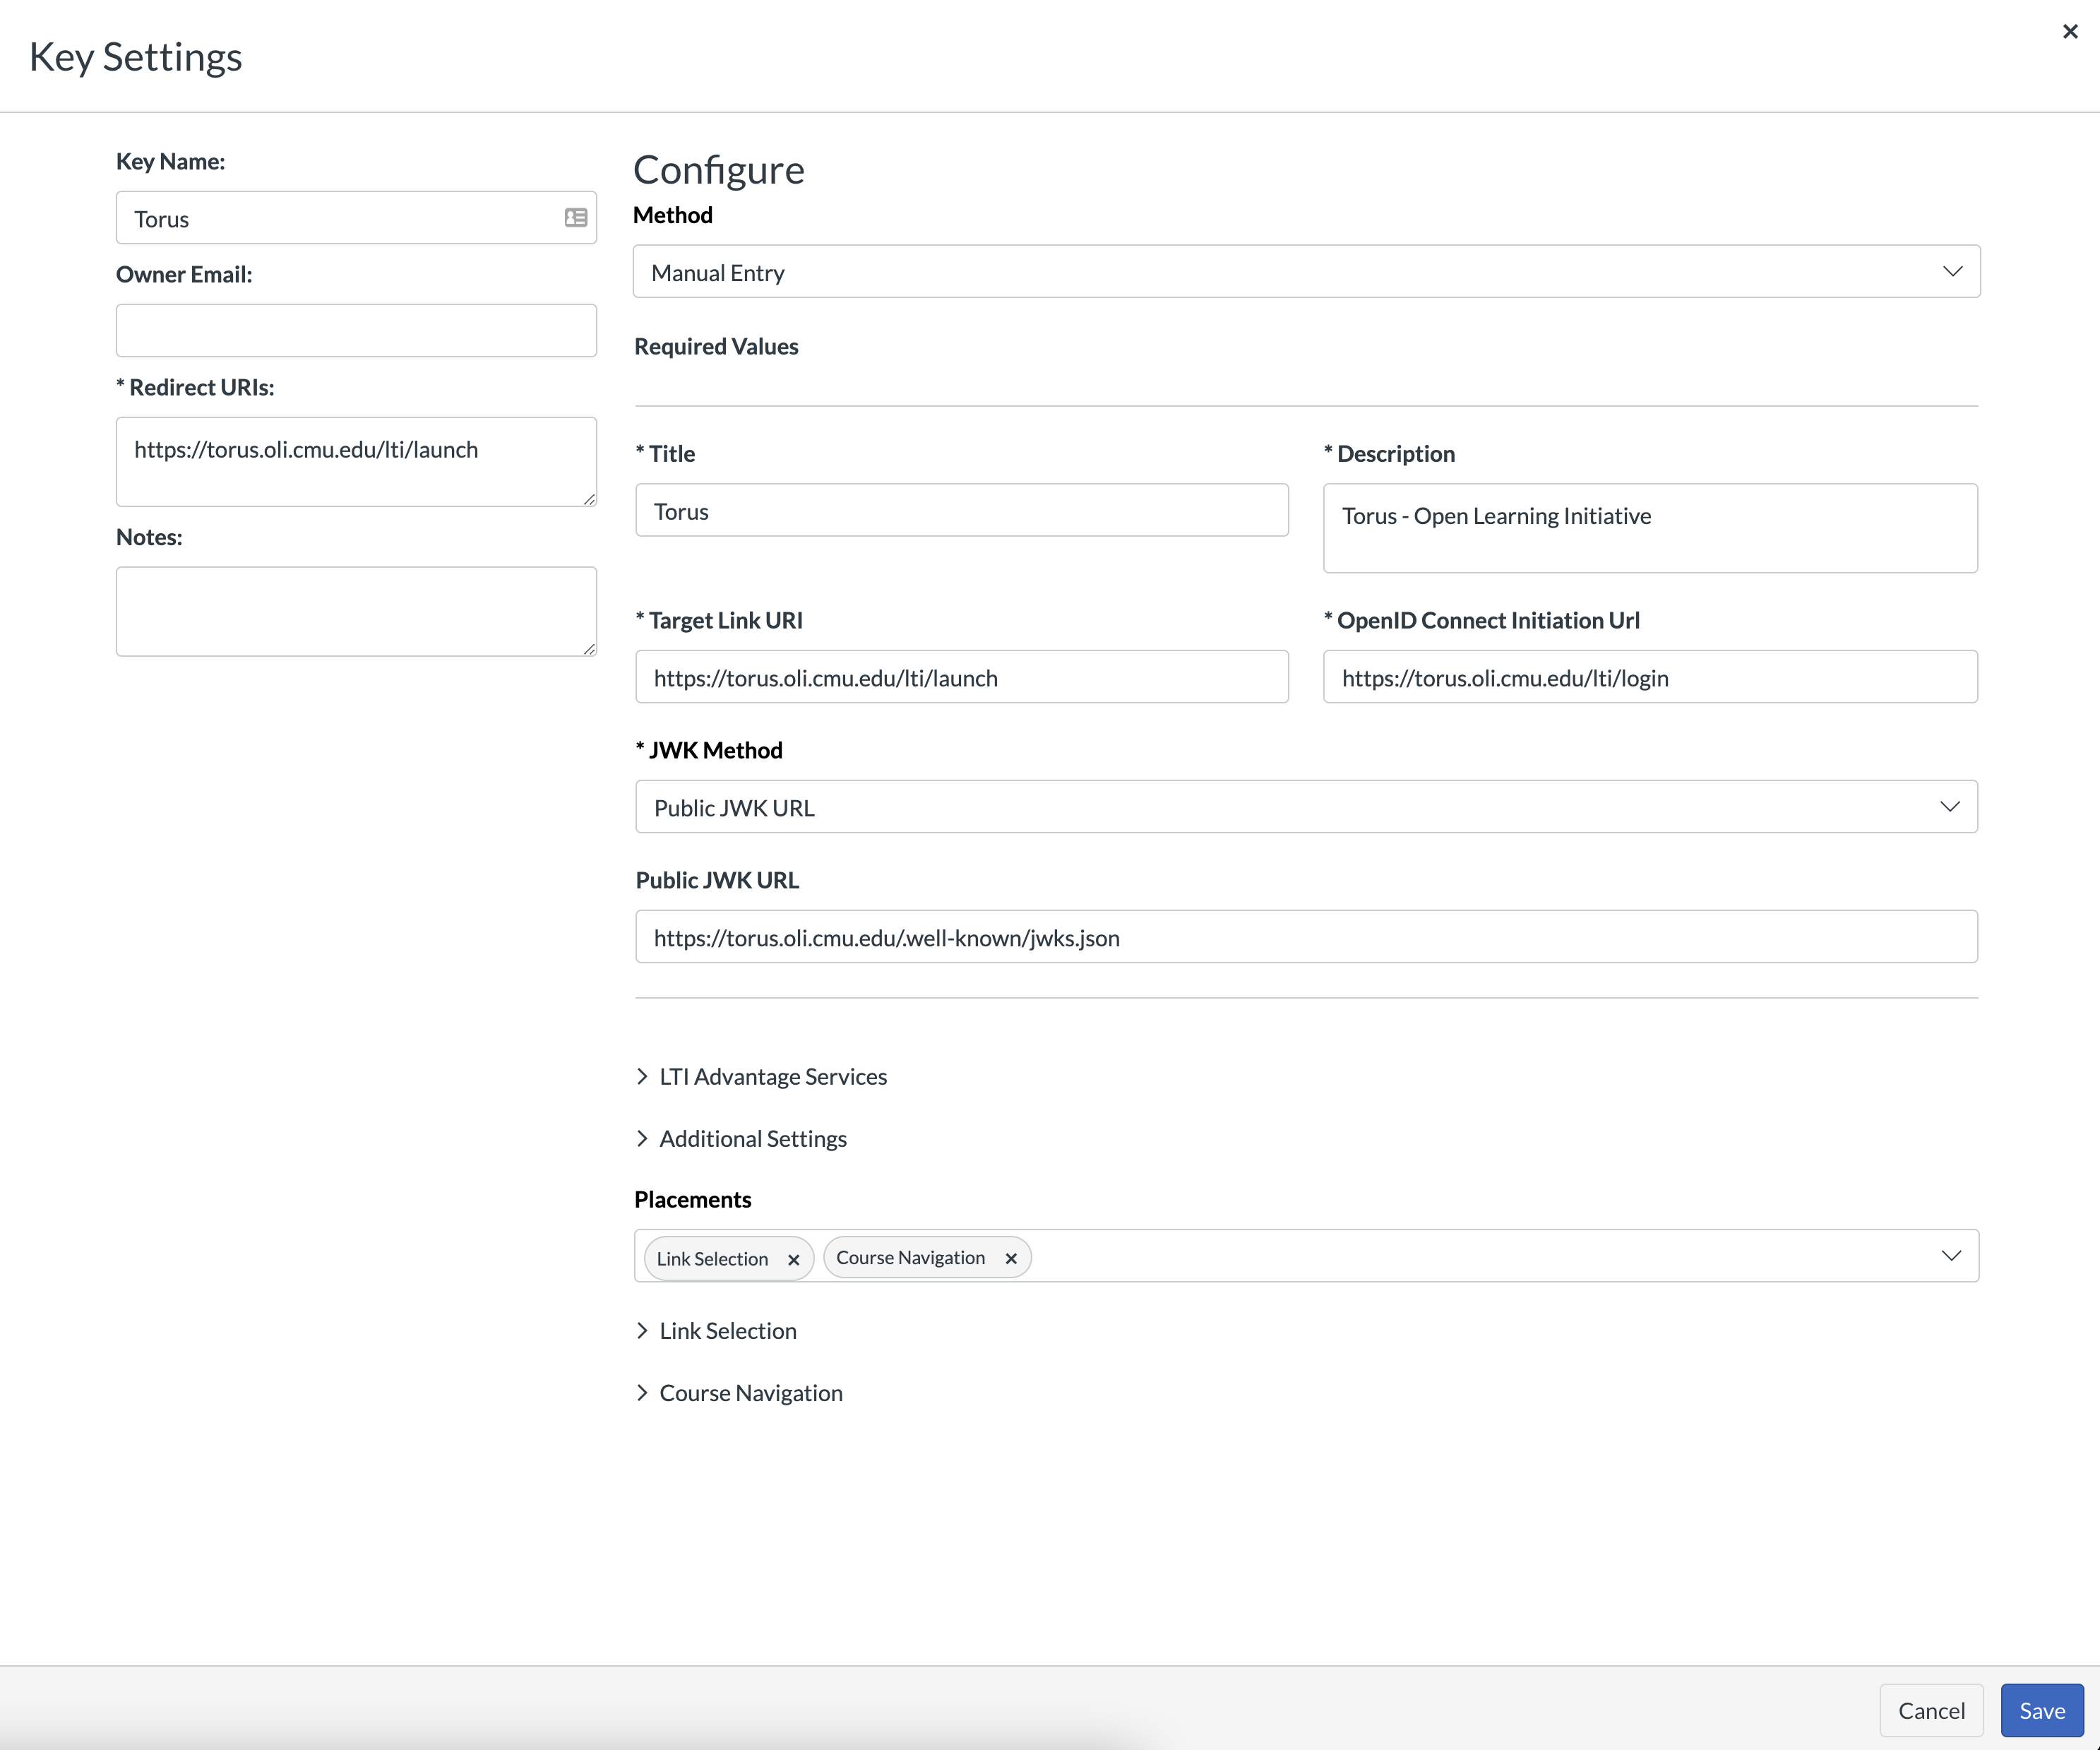
Click "Save".
- Configure the following fields with values that correspond to your torus deployment. For example, if you are hosting torus at a specific domain or in a development environment using a service such as ngrok, you will want to replace all instances of
-
-
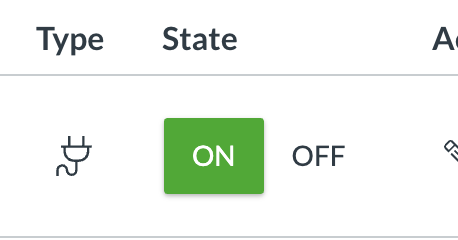
Enable the newly created LTI Key by setting it to "ON". Your LTI 1.3 key is now configured and ready to use!
-
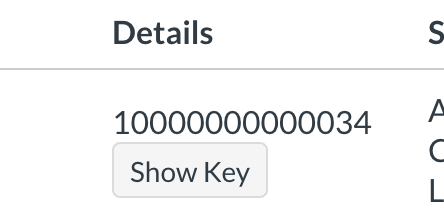
Copy the corresponding number under details for future use, (e.g. 10000000000034). This will be our Client ID.
This will enable torus to be used by any course in the LMS and will only require a single registration request.
-
Navigate to your canvas admin panel "Admin" > [account name] > "Settings" > "Apps"
-
Select Configuration Type "By Client ID" and insert the Client ID we kept from the previous steps. Click "Submit". When prompted to install the tool, select "Install".

-
We must configure this specific deployment with torus, as mentioned in the previous section 'Configuring LTI 1.3 in Torus'. To do this, we must get the Deployment ID by Selecting the "gear" menu > Deployment Id.


Copy this entire ID and use it to configure a deployment in Torus as outlined in the previous section 'Configuring LTI 1.3 in Torus'.
This will enable torus to be used by a single course and will only require a registration request for every course that uses this method.
-
Navigate to your course and click "Settings" > "Apps"


-
Select Configuration Type "By Client ID" and insert the Client ID we kept from the previous steps. Click "Submit". When prompted to install the tool, select "Install".

-
We must configure this specific deployment with torus, as mentioned in the previous section 'Configuring LTI 1.3 in Torus'. To do this, we must get the Deployment ID by Selecting the "gear" menu > Deployment Id.


Copy this entire ID and use it to configure a deployment in Torus as outlined in the previous section 'Configuring LTI 1.3 in Torus'.
-
If you configured your LTI 1.3 Developer Key with placements other than Link, you will see Torus appear in those places. Otherwise, the default placement is a Link Selection placement which allows you to add Torus to any module in your course as you normally would by clicking the plus "+" button on a module, selecting "External Tool" and finally selecting the Torus tool we just added. Click "Add Item".

-
Navigate to Torus through the placement you configured, and you should be guided through course setup, which is outside the scope of this document. If you see any errors related to your LTI configuration, you may need to revisit the previous section 'Configuring LTI 1.3 in Torus' or your canvas instance may be improperly configured. The error message should give you an indication of the specific issue and provide a link to OLI support for further help if needed.
Coming soon...
Coming soon...
To manually configure an LTI 1.3 integration in Torus, we need to gather some important LMS details first. These details can usually be supplied by an LMS administrator. For certain values such as Client ID and Deployment ID, you will need to configure Torus in your LMS first before you can get this value. It is recommended you or your LMS administrator follow the steps in the section 'Configuring LTI 1.3 in LMS' below to obtain this.
- Issuer (e.g. https://canvas.oli.cmu.edu)
- Client ID: This is obtained by creating an LTI 1.3 Developer Key in the LMS. See specific instructions below depending on your LMS.
- Key Set Url (e.g. https://canvas.oli.cmu.edu/api/lti/security/jwks)
- Auth Token Url (e.g. https://canvas.oli.cmu.edu/login/oauth2/token)
- Auth Login Url (e.g. https://canvas.oli.cmu.edu/api/lti/authorize_redirect)
- Auth Server Url (e.g. https://canvas.oli.cmu.edu)
-
KID (e.g. 2018-05-18T22:33:20Z). This can also be obtained by entering the Key Set URL in your browser and extracting the first value for
"kid":"2018-05-18T22:33:20Z" - Deployment ID This is obtained by creating an LTI 1.3 Deployment in the LMS. See specific instructions below depending on your LMS.
-
In Torus as an Administrator, select "Institutions" from the sidebar on the left of the workspace, then click "Register New Institution"

-
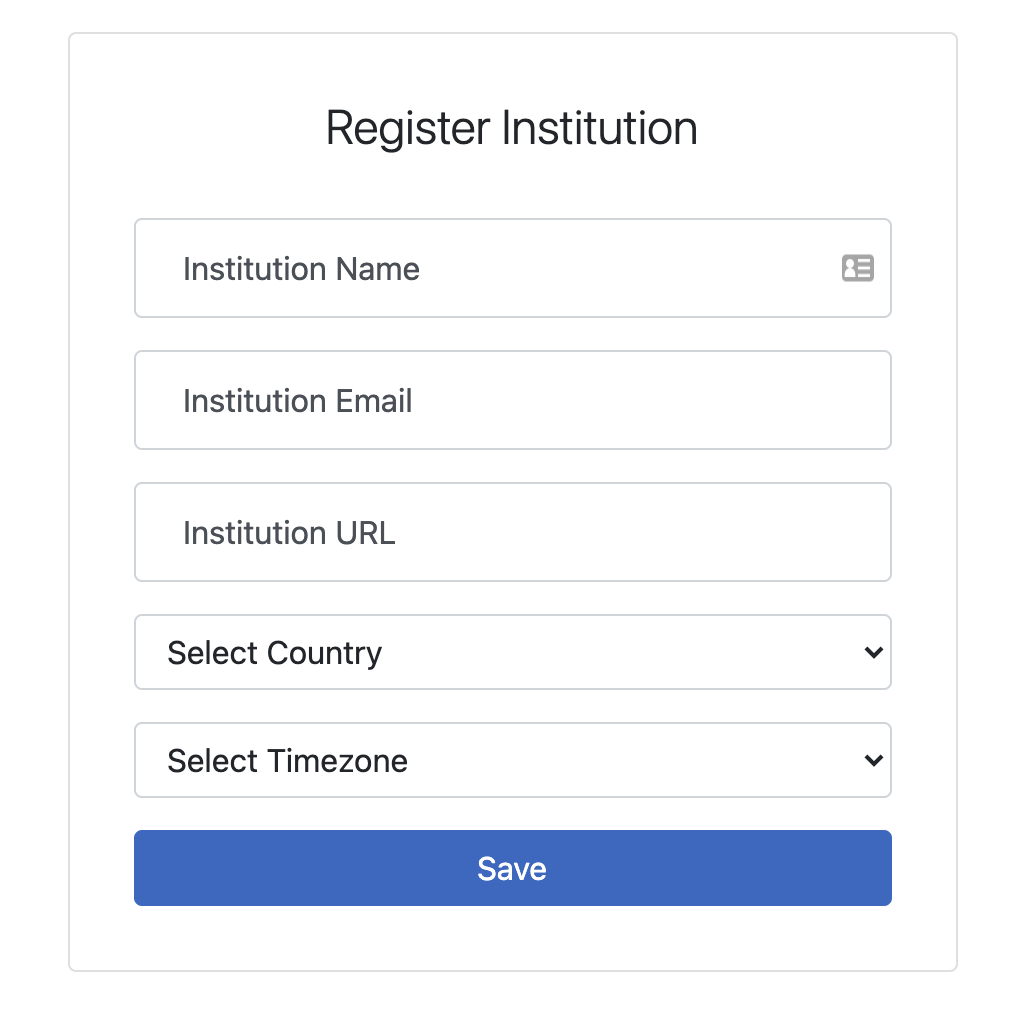
Enter your Institution's details and click "Save"
-
Click the "Details" button for the institution you just created
-
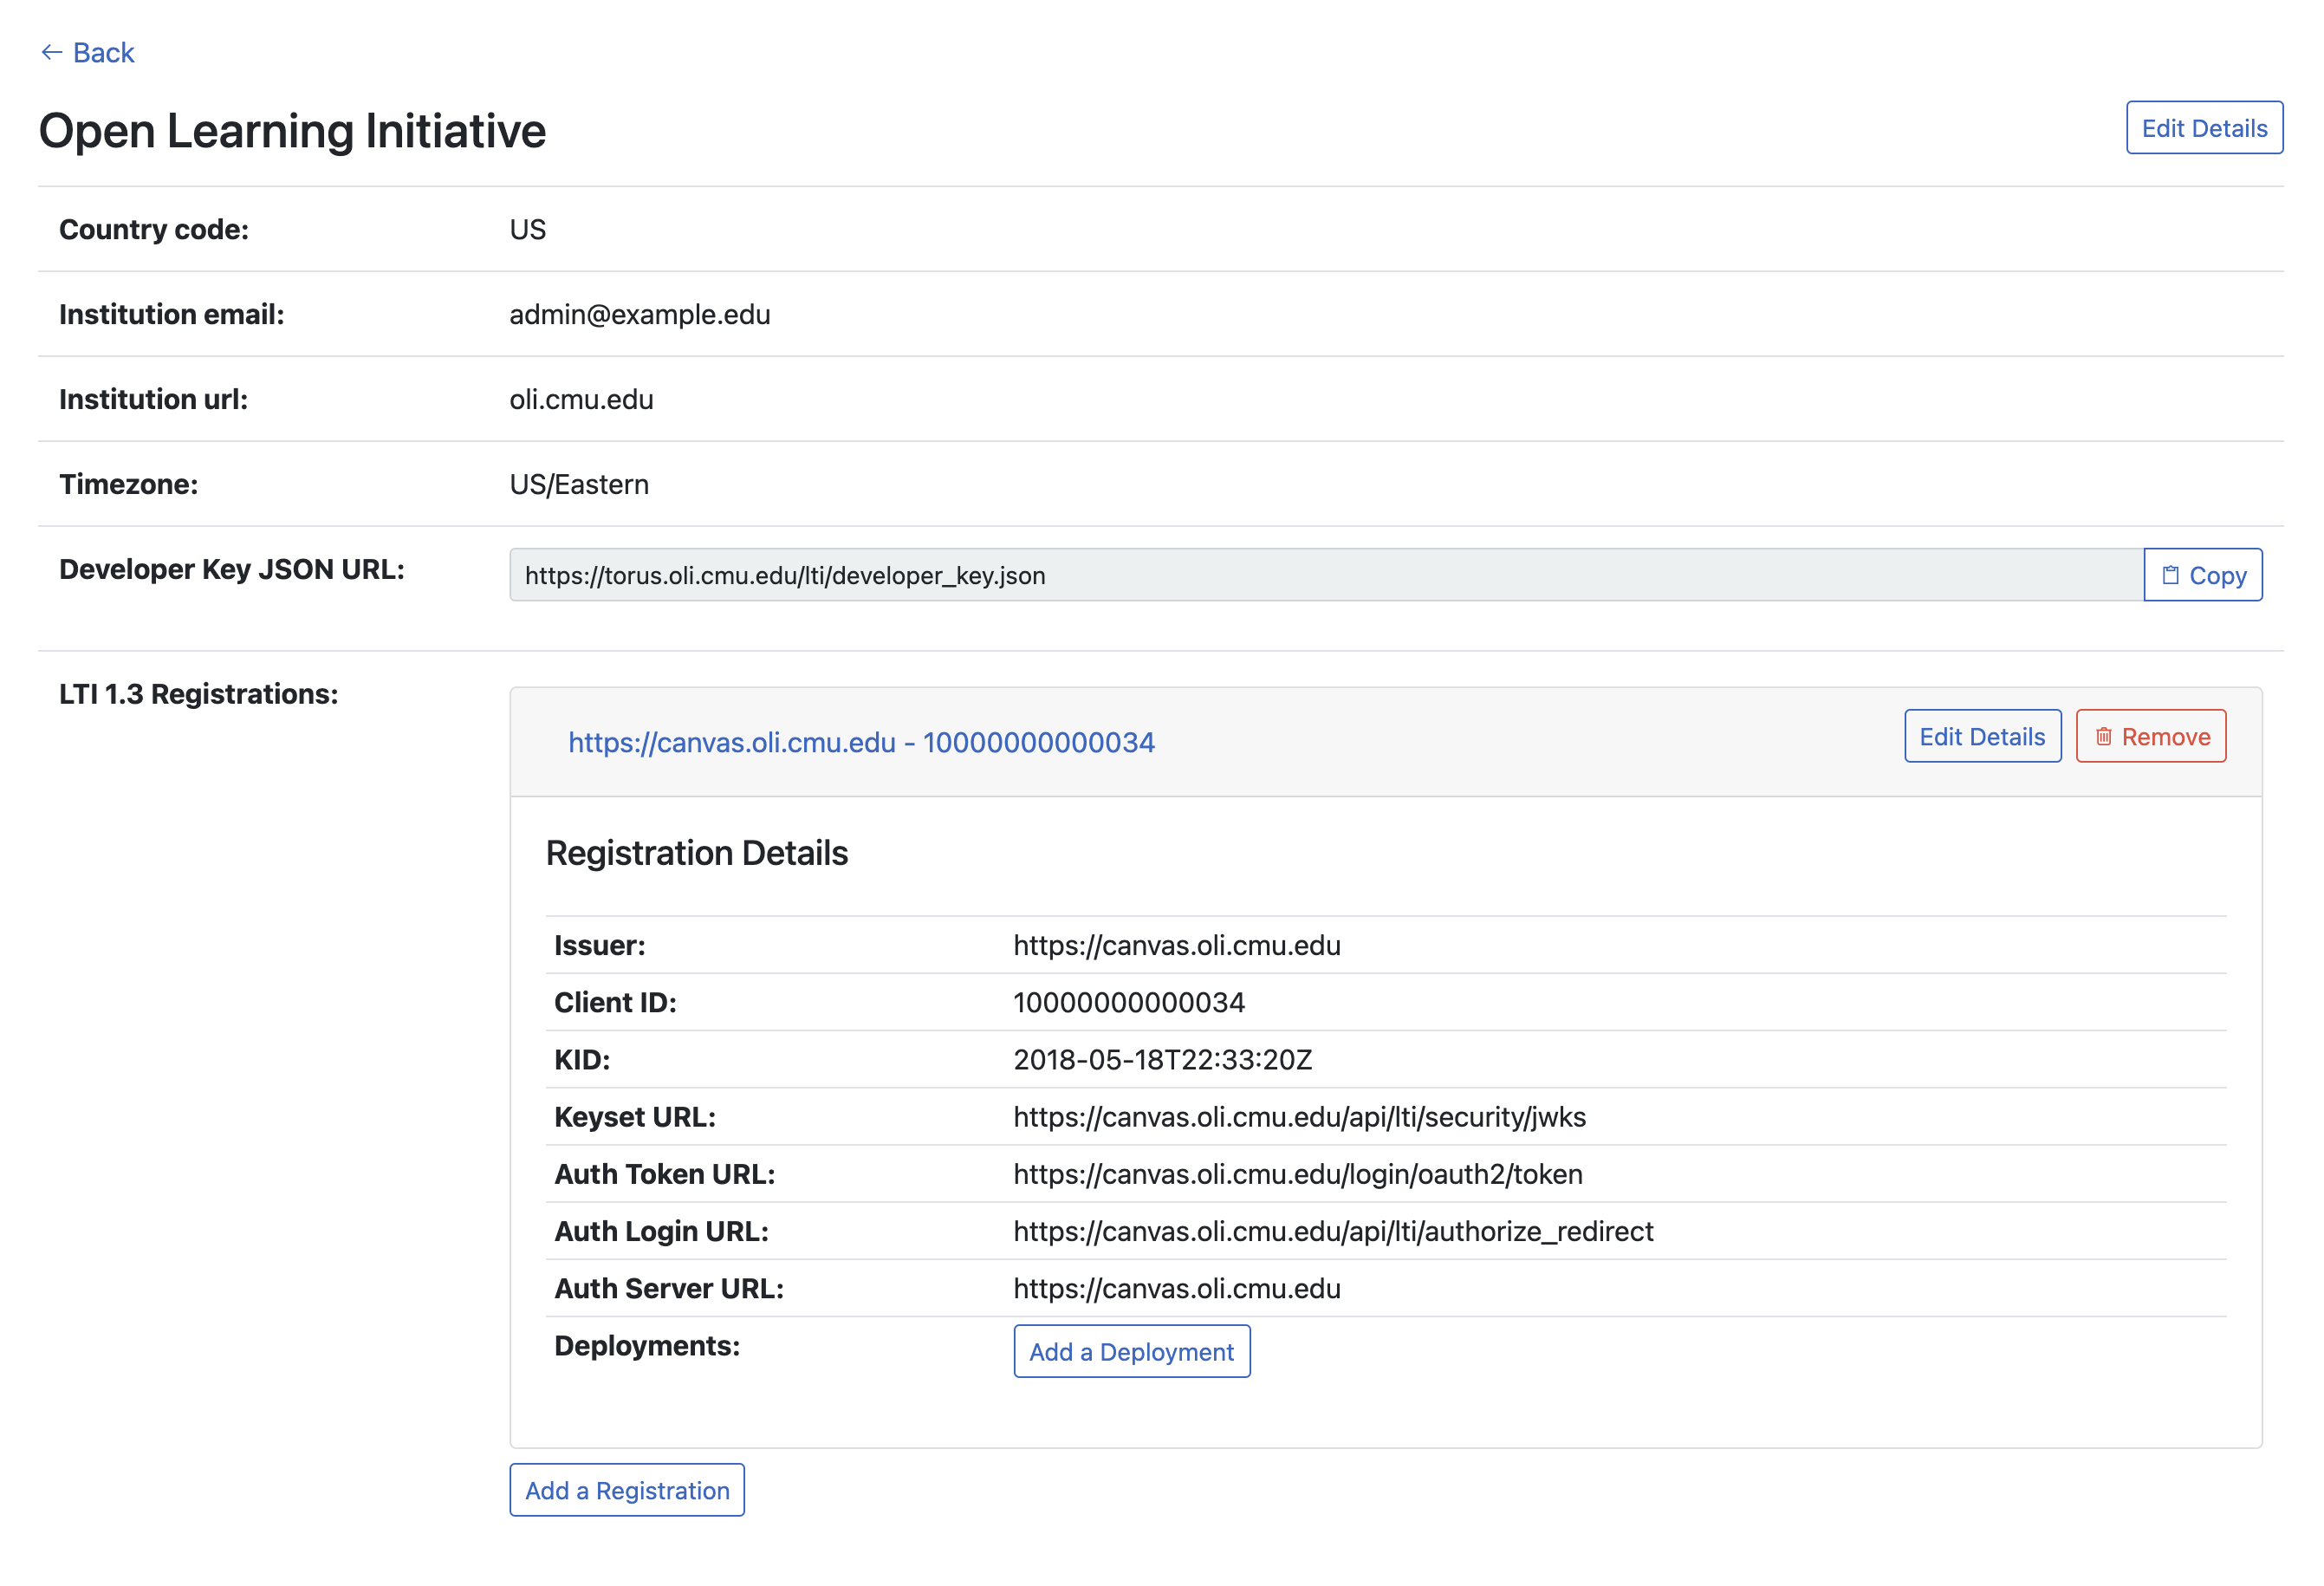
Click "Add Registration" and enter registration details, which are outlined above and should be provided by your LMS administrator. You may use a placeholder value for Client ID if you haven't configured an LTI Key in your LMS yet, but it is very important you return and update this value before launching into Torus. When finished, click on the registration labeled by its [Issuer - Client ID] to expand it.
-
Click "Add Deployment" and enter the Deployment ID saved from the instructions below when you created a deployment in your LMS. Click "Save".
-
Once you have a Registration and a Deployment configured for your Institution, you can now return to your LMS and launch into Torus and you will be guided through course setup, which is outside the scope of this document.