First, click the green Use this template button near the top of this page.
This will take you to Github's 'Generate Repository' page.
Fill in a repository name and short description, and click 'Create repository from template'.
This will allow you to create a new repository in your Github account,
prepopulated with the contents of this project.
Now you can clone the project locally and get to work!
git clone https://github.com/<user>/<your_new_repo>.git
If you know you're not going to use one or more of the optional gui/graphics
frameworks (fltk, gtkmm, imgui, etc.), you can remove them with git rm:
git rm -r src/<unnecessary_framework>
Note about install commands:
- for Windows, we use choco.
- for MacOS, we use brew.
- In case of an error in cmake, make sure that the dependencies are on the PATH.
This is a really long list of dependencies, and it's easy to mess up. That's why we have a Docker image that's already set up for you. See the Docker instructions below.
- A C++ compiler that supports C++17. See cppreference.com to see which features are supported by each compiler. The following compilers should work:
-
Install command
-
Debian/Ubuntu:
sudo apt install build-essential -
Windows:
choco install mingw -y -
MacOS:
brew install gcc
-
-
Install command
-
Debian/Ubuntu:
bash -c "$(wget -O - https://apt.llvm.org/llvm.sh)" -
Windows:
Visual Studio 2019 ships with LLVM (see the Visual Studio section). However, to install LLVM separately:
choco install llvm -yllvm-utils for using external LLVM with Visual Studio generator:
git clone https://github.com/zufuliu/llvm-utils.git cd llvm-utils/VS2017 .\install.bat -
MacOS:
brew install llvm
-
-
Install command + Environment setup
On Windows, you need to install Visual Studio 2019 because of the SDK and libraries that ship with it.
Visual Studio IDE - 2019 Community (installs Clang too):
choco install -y visualstudio2019community --package-parameters "add Microsoft.VisualStudio.Workload.NativeDesktop --includeRecommended --includeOptional --passive --locale en-US"Put MSVC compiler, Clang compiler, and vcvarsall.bat on the path:
	choco install vswhere -y
	refreshenv

	# change to x86 for 32bit
	$clpath = vswhere -products * -latest -prerelease -find **/Hostx64/x64/*
	$clangpath = vswhere -products * -latest -prerelease -find **/Llvm/bin/*
	$vcvarsallpath =  vswhere -products * -latest -prerelease -find **/Auxiliary/Build/*

	$path = [System.Environment]::GetEnvironmentVariable("PATH", "User")
	[Environment]::SetEnvironmentVariable("Path", $path + ";$clpath" + ";$clangpath" + ";$vcvarsallpath", "User")
	refreshenv
-
Install Command
-
Via pip - https://docs.conan.io/en/latest/installation.html#install-with-pip-recommended
pip install --user conan -
Windows:
choco install conan -y -
MacOS:
brew install conan
-
-
Install Command
-
Debian/Ubuntu:
sudo apt-get install cmake -
Windows:
choco install cmake -y -
MacOS:
brew install cmake
-
-
Install Command
-
Debian/Ubuntu:
sudo apt-get install doxygen sudo apt-get install graphviz -
Windows:
choco install doxygen.install -y choco install graphviz -y -
MacOS:
  brew install doxygen
  brew install graphviz
-
-
Install Command
-
Debian/Ubuntu:
sudo apt-get install ccache -
Windows:
choco install ccache -y -
MacOS:
brew install ccache
-
-
Install Command
-
Debian/Ubuntu:
sudo apt-get install cppcheck -
Windows:
choco install cppcheck -y -
MacOS:
brew install cppcheck
-
-
Install Command
Follow instructions here: https://github.com/include-what-you-use/include-what-you-use#how-to-install
This project can be made to work with several optional GUI frameworks.
If desired, you should install the following optional dependencies as directed by their documentation, linked here:
The following dependencies can be downloaded automatically by CMake and Conan. All you need to do to install them is to turn on a CMake flag during configuration. If you run into difficulty using them, please refer to their documentation, linked here:
- NANA
- SDL
- IMGUI: This framework depends on SFML, and if you are using Linux, you may need to install several of SFML's dependencies using your package manager. See the SFML build tutorial for specifics.
A full build has different steps:
- Specifying the compiler using environment variables
- Configuring the project
- Building the project
For the subsequent builds, in case you change the source code, you only need to repeat the last step.
By default (if you don't set environment variables CC and CXX), the system default compiler will be used.
Conan and CMake use the environment variables CC and CXX to decide which compiler to use. So to avoid the conflict issues only specify the compilers using these variables.
CMake will detect which compiler was used to build each of the Conan targets. If you build all of your Conan targets with one compiler, and then build your CMake targets with a different compiler, the project may fail to build.
Commands for setting the compilers
-
Debian/Ubuntu/MacOS:
Set your desired compiler (
clang,gcc, etc):-
Temporarily (only for the current shell)
Run one of the followings in the terminal:
-
clang
CC=clang CXX=clang++ -
gcc
CC=gcc CXX=g++
-
-
Permanent:
Open
~/.bashrcusing your text editor:gedit ~/.bashrcAdd
CCandCXXto point to the compilers:export CC=clang export CXX=clang++Save and close the file.
-
-
Windows:
-
Permanent:
Run one of the followings in PowerShell:
-
Visual Studio generator and compiler (cl)
  [Environment]::SetEnvironmentVariable("CC", "cl.exe", "User")
  [Environment]::SetEnvironmentVariable("CXX", "cl.exe", "User")
  refreshenv
Set the architecture using vsvarsall:
vsvarsall.bat x64 -
clang
[Environment]::SetEnvironmentVariable("CC", "clang.exe", "User") [Environment]::SetEnvironmentVariable("CXX", "clang++.exe", "User") refreshenv -
gcc
  [Environment]::SetEnvironmentVariable("CC", "gcc.exe", "User")
  [Environment]::SetEnvironmentVariable("CXX", "g++.exe", "User")
  refreshenv
-
-
Temporarily (only for the current shell):
	$Env:CC="clang.exe"
	$Env:CXX="clang++.exe"
-
To configure the project, you could use cmake, or ccmake or cmake-gui. Each of them are explained in the following:
With Cmake directly:
cmake -S . -B ./build
Cmake will automatically create the ./build folder if it does not exist, and it wil configure the project.
With the Cmake Curses Dialog Command Line tool:
ccmake -S . -B ./build
Once ccmake has finished setting up, press 'c' to configure the project,
press 'g' to generate, and 'q' to quit.
To use the GUI of the cmake:
2.c.1) Open cmake-gui from the project directory:
cmake-gui .
2.c.2) Set the build directory:
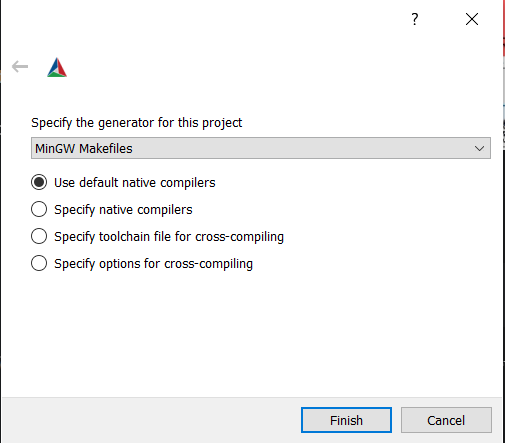
2.c.3) Configure the generator:
In cmake-gui, from the upper menu select Tools/Configure.
Warning: if you have set CC and CXX always choose the use default native compilers option. This picks CC and CXX. Don't change the compiler at this stage!
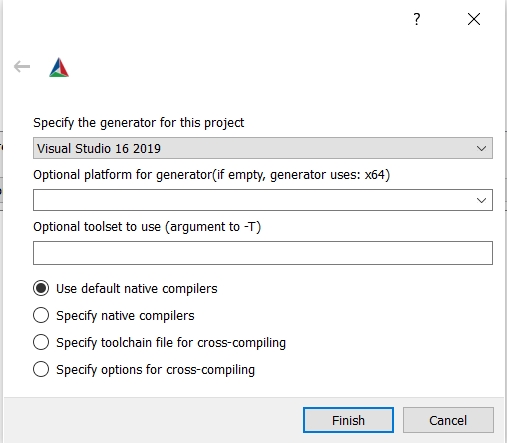
Windows - Visual Studio generator and compiler
You should have already set C and CXX to cl.exe.
Choose "Visual Studio 16 2019" as the generator:
Windows - Visual Studio generator and Clang Compiler
You should have already set C and CXX to clang.exe and clang++.exe.
Choose "Visual Studio 16 2019" as the generator. To tell Visual studio to use clang-cl.exe:
- If you use the LLVM that is shipped with Visual Studio: write
ClangClunder "optional toolset to use".
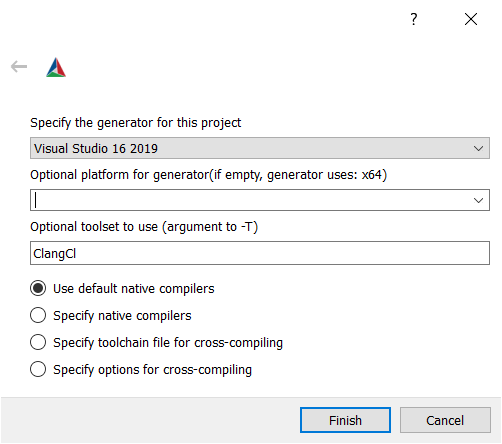
- If you use an external LLVM: write
LLVM_v142under "optional toolset to use".
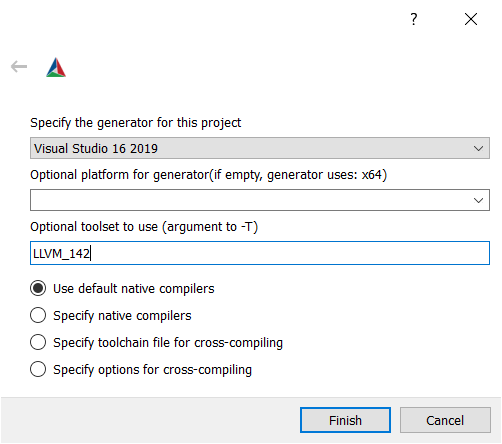
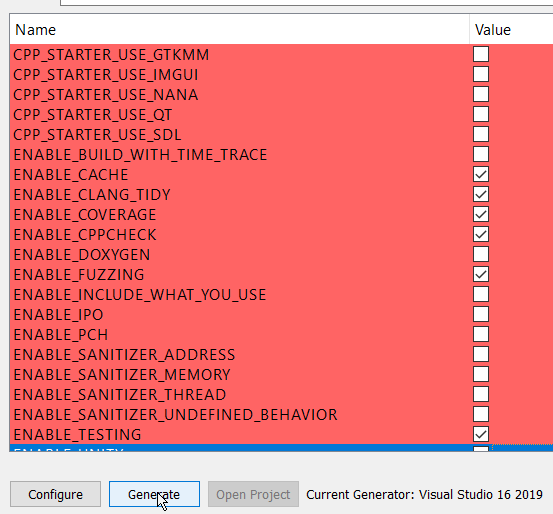
2.c.4) Choose the Cmake options and then generate:
Once you have selected all the options you would like to use, you can build the project (all targets):
cmake --build ./build
For Visual Studio, give the build configuration (Release, RelWithDeb, Debug, etc) like the following:
cmake --build ./build -- /p:configuration=Release
You can use the ctest command run the tests.
cd ./build
ctest -C Debug
cd ../Many problems that users have can be resolved by updating Conan, so if you are having any trouble with this project, you should start by doing that.
To update conan:
pip install --user --upgrade conan
You may need to use pip3 instead of pip in this command, depending on your
platform.
If you continue to have trouble with your Conan dependencies, you can try clearing your Conan cache:
conan remove -f '*'
The next time you run cmake or cmake --build, your Conan dependencies will
be rebuilt. If you aren't using your system's default compiler, don't forget to
set the CC, CXX, CMAKE_C_COMPILER, and CMAKE_CXX_COMPILER variables, as
described in the 'Build using an alternate compiler' section above.
If you have a dependency 'A' that requires a specific version of another dependency 'B', and your project is trying to use the wrong version of dependency 'B', Conan will produce warnings about this configuration error when you run CMake. These warnings can easily get lost between a couple hundred or thousand lines of output, depending on the size of your project.
If your project has a Conan configuration error, you can use conan info to
find it. conan info displays information about the dependency graph of your
project, with colorized output in some terminals.
cd build
conan info .
In my terminal, the first couple lines of conan info's output show all of the
project's configuration warnings in a bright yellow font.
For example, the package spdlog/1.5.0 depends on the package fmt/6.1.2.
If you were to modify the file conanfile.py so that it requires an
earlier version of fmt, such as fmt/6.0.0, and then run:
conan remove -f '*'       # clear Conan cache
rm -rf build              # clear previous CMake build
cmake -S . -B ./build     # rebuild Conan dependencies
conan info ./build
...the first line of output would be a warning that spdlog needs a more recent
version of fmt.
See Catch2 tutorial
If you have Docker installed, you can run this in your terminal, when the Dockerfile is in your working directory:
docker build --tag=my_project:latest .
docker run -it my_project:latest
This command will put you in a bash session in a Ubuntu 18.04 Docker container,
with all of the tools listed in the Dependencies section already installed.
Additionally, you will have g++-10 and clang++-11 installed as the default
versions of g++ and clang++.
If you want to build this container using some other versions of gcc and clang,
you may do so with the GCC_VER and LLVM_VER arguments:
docker build --tag=myproject:latest --build-arg GCC_VER=9 --build-arg LLVM_VER=10 .The CC and CXX environment variables are set to GCC version 10 by default. If you wish to use clang as your default CC and CXX environment variables, you may do so like this:
docker build --tag=my_project:latest --build-arg USE_CLANG=1 .You will be logged in as root, so you will see the # symbol as your prompt.
You will be in a directory that contains a copy of the cpp_starter_project;
any changes you make to your local copy will not be updated in the Docker image
until you rebuild it.
If you need to mount your local copy directly in the Docker image, see
Docker volumes docs.
TLDR:
docker run -it \
	-v absolute_path_on_host_machine:absolute_path_in_guest_container \
	my_project:latest
You can configure and build as directed above using these commands:
/starter_project# mkdir build
/starter_project# cmake -S . -B ./build
/starter_project# cmake --build ./build
You can configure and build using clang-11, without rebuilding the container,
with these commands:
/starter_project# mkdir build
/starter_project# CC=clang CXX=clang++ cmake -S . -B ./build
/starter_project# cmake --build ./build
The ccmake tool is also installed; you can substitute ccmake for cmake to
configure the project interactively.
All of the tools this project supports are installed in the Docker image;
enabling them is as simple as flipping a switch using the ccmake interface.
Be aware that some of the sanitizers conflict with each other, so be sure to
run them separately.
A script called build_examples.sh is provided to help you to build the example
GUI projects in this container.


