A tool to easily create emails in Laravel using a fluent interface.
You can install the package via composer:
composer require aridez/simple-mail-builderIf you want to customize the mail views, you can publish them running:
php artisan vendor:publish --provider="Aridez\MailBuilder\Providers\MailBuilderServiceProvider"To start using the package, you need to create an instance of MailMessageBuilder or just use the Mailbuilder facade. Here's a basic example of how to use the package within a Laravel notification:
use Illuminate\Notifications\Notification;
use Aridez\MailBuilder\Facades\MailBuilder;
class WelcomeMessage extends Notification
{
[...]
public function toMail(object $notifiable)
{
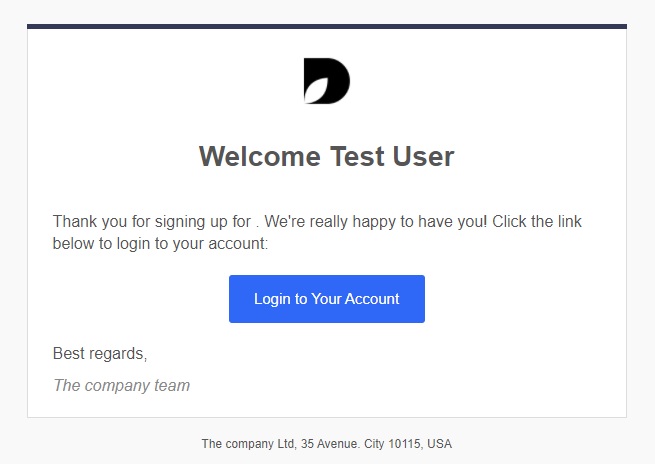
return MailBuilder::brand('https://i.imgur.com/KO1vcE9.png')->space(15)
->title('Welcome ' . $notifiable->name)->space(20)
->text('Thank you for signing up for . We\'re really happy to have you! Click the link below to login to your account:')->space(10)
->button('Login to Your Account', 'google.es')->space(10)
->text('Best regards,')->space(5)
->italic('The company team')
->include(['footer' => 'The company Ltd, 35 Avenue. City 10115, USA']);
}
}This code will create an email that looks like this:
The MailMessageBuilder class provides several methods to add components and pass data to your views:
| Method | Description |
|---|---|
brand(string $image_url) |
Insert a brand image component. |
title(string $title) |
Insert a title component. |
text(string $text) |
Insert a plain text component. |
button(string $button_text, string $button_url) |
Insert a clickable button component. |
link(string $link_text, string $link_url) |
Insert a clickable link component. |
italic(string $text) |
Insert a grey italic text component. |
space(int $height) |
Insert vertical space component. |
theme(string $theme) |
Change the theme of the email view. |
component(string $name, array $props = []) |
Insert an arbitrary component with props. |
include(array $data) |
Append an array of top-level data. |
You can customize your views by creating or modifying the default theme of this package. First, publish the views as seen in the installation section. This makes them available under the folder resources\views\vendow\mailbuilder\components\themes\default.
In order to create a component, just create a new blade file under that directory. You can take another of the default theme components as an example. Let's create a small text component called small-text.blade.php:
<!-- File: resources\views\vendow\mailbuilder\components\themes\default\small-text.blade.php -->
@props([
    'text' => null
])

<tr>
    <td align="left" style="font-size:0px;padding:0px 25px;word-break:break-word;">
        <div
            style="font-family:'Helvetica Neue',Arial,sans-serif;font-size:8px;line-height:22px;text-align:left;color:#888;">
            {{$text}}
        </div>
    </td>
</tr>
Now, we will be able to use this component by calling the function component. The first parameter is a string that must be the name of the view (in this case small-text) and the second is a key => value array where the keys must be the same as the props defined in our component:
public function toMail(object $notifiable)
{
    return MailBuilder::component('small-text', ['text' => 'This text is passed through the component props now!']);
}To create a new whole custom theme, just create a new folder under resources\views\vendor\mailbuilder\components\themes with the name of the theme you want to use and modify there the files accordingly:
resources/views/vendor/mailbuilder/components/themes
│
├── default
│ ├── brand.md
│ ├── title.md
│ ├── text.md
│ ├── button.md
│ ├── link.md
│ ├── italic.md
│ └── space.md
│
├── blue
│ ├── brand.md
│ ├── title.md
│ ├── text.md
│ ├── button.md
│ ├── link.md
│ ├── italic.md
│ └── space.md
Whenever you create a new theme, it is important to use the index.blade.php as an entry point and also include the following lines where you will want to insert the parametrized components:
@foreach ($components as $component)
@component($component['view'], $component['props'])
@endcomponent
@endforeach
These lines are in charge of calling, rendering and passing any props to the corresponding view. You can take a look at the index.blade.php file as an example.
Finally, to use a different theme you can call the theme function passing the name of the theme as a parameter:
public function toMail(object $notifiable)
{
    return MailBuilder::theme('blue')->...;
}Sometimes, you will also want to pass additional data accessible from your index.blade.php component, for example for headers or footers. For those cases you can use the include function and pass a key => value array that will get passed normally to your view. For example, if we want to access a $footer variable from our index component we can do:
    public function toMail(object $notifiable)
    {
        return MailBuilder::include(['footer' => 'The company Ltd, 35 Avenue. City 10115, USA'])->...<
    }
📝 Note: Make sure to avoid using the
componentskey since it is reserved to render the array of components
Contributions are welcome! Please follow these guidelines:
- Fork the repository.
- Create a new branch (
git checkout -b feature/your-feature). - Make your changes.
- Commit your changes (
git commit -am 'Add new feature'). - Push to the branch (
git push origin feature/your-feature). - Create a new Pull Request.
To prepare the development environment, you need to add it to your Laravel application. Developing locally, you can create a local repository. In your Laravel project's composer.json, add the local repository path:
"repositories": [
    {
        "type": "path",
        "url": "<path-to>/simple-mail-builder"
    }
]
Then you can require the package normally:
composer require aridez/simple-mail-builder- Responsive email templates by ckissi