Pure offline maps for flutter. This is a port of mapsforge for java/android [https://github.com/mapsforge/mapsforge]
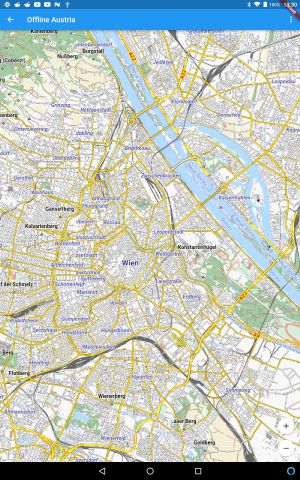
The main feature of this library is to read mapfiles stored locally at the user's device and render the mapfiles on the user's device without any internet connection.
Start with the simplified_example/README.md
Find many more examples in the subdirectory example/README.md
- Day and night themes
- World map
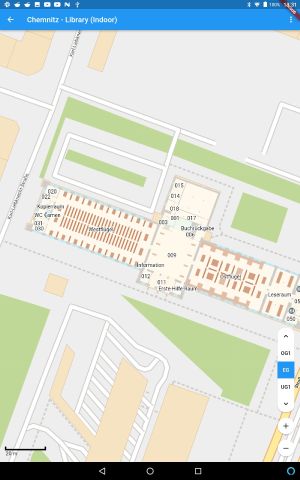
- Indoor examples
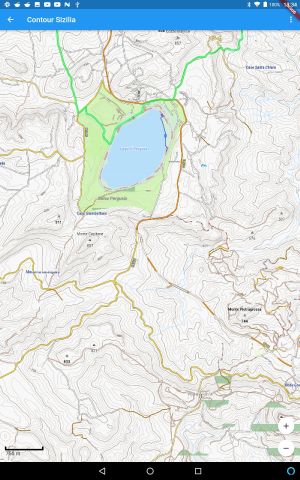
- Hillshading
- Context menus
- Markers
- Drag'n'drop
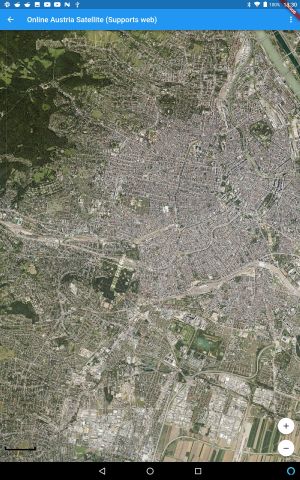
- Online-maps
- Rotation
First and foremost to the author of mapsforge. He has done an outstanding job!
Also to the university of chemnitz which implements indoor map support
include the library in your pubspec.yaml:
mapsforge_flutter: ^3.0.1Note: For development purposes consider to include the github repository directly.
include a list of all used assets in your pubspec.yaml (see pubspec file from example project)
    flutter:

      assets:
        - packages/mapsforge_flutter/assets/patterns/coniferous.svg
        - packages/mapsforge_flutter/assets/patterns/coniferous_and_deciduous.svg
        - packages/mapsforge_flutter/assets/patterns/deciduous.svg
# and moreLoad the mapfile which holds the openstreetmap ® data
Mapfiles are files specifically designed for mobile use and provide the information about an area in condensed form. Please visit the original project for more information about how to download/generate them.
Datastore datastore = IsolateMapfile(filename);
or
Datastore datastore = await MapFile.using(content, null, null);
The former is used to read mapfiles from the filesystem whereas the latter is used to read mapfiles from memory. If you do not want to use Isolates you can also use the Mapfile directly like so:
Datastore datastore = await MapFile.from(filename, null, null);
Note: Destroy the mapfile by calling dispose() if not needed anymore
Create the cache for assets
Assets are mostly small images to display in the map, for example parking signs, bus stop signs and so on
SymbolCache symbolCache = FileSymbolCache();
Create the displayModel which defines and holds the view/display settings like maximum zoomLevel.
DisplayModel displayModel = DisplayModel();
Note: For crisper maps consider to set the deviceScaleFactor to a higher value, e.g. 2
Create the render theme which specifies how to render the informations from the mapfile.
You can think of it like a css-file for mapsforge
RenderTheme renderTheme = await
RenderThemeBuilder.create(displayModel, "assets/render_themes/defaultrender.xml");
Create the Renderer.
The renderer is the rendering engine for the mapfiles. This code does the main work to render the contents of a mapfile together with the design guides from the rendertheme into bitmap tiles. Bitmap tiles are png files with a fixed width/height. Multiple tiles together forms the map.
JobRenderer jobRenderer = MapDataStoreRenderer(mapFile, renderTheme, symbolCache, true);
Alternatively use the onlineRenderer instead to provide the tiles from openstreetmap ®
By using the online-renderer you will not need the rendertheme nor the mapfiles.
JobRenderer jobRenderer = MapOnlineRenderer();
Optionally you can create a cache for the bitmap tiles. The tiles will survive a restart but may fill the disk space.
TileBitmapCache bitmapCache = await FileTileBitmapCache.create(jobRenderer.getRenderKey());
or
TileBitmapCache bitmapCache = await MemoryTileBitmapCache.create();
Glue everything together into two models.
The mapModel holds all map-relevant informations whereas the viewModel holds all informations related to how to display the map for the current widget
MapModel mapModel = MapModel(
  displayModel: displayModel,
  renderer: jobRenderer,
  symbolCache: symbolCache,
  tileBitmapCache: bitmapCache,
);

ViewModel viewModel = ViewModel(displayModel: displayModel);
Include the mapView in the build() method of your APP:
Scaffold(
    body:
        MapviewWidget(
            displayModel: displayModel,
            createMapModel: () async {
                return mapModel();
            },
            createViewModel: () async {
                return viewModel();
            },
        ),
);
Voilà you are done.
In order to change the position in the map programmatically call the viewModel with the new position:
viewModel.setMapViewPosition(48.0901926 , 16.308939);
Similar methods exists for zooming and rotation.
First take a look at the simplified example to understand how everything works together. Check the examples for many more features like markers, context menus and rotation.
Same license as the original mapsforge project. LPGL-v3
Help is appreciated...
If you find some bug or make enhancements feel free to contribute via PullRequests. Also feel free to create bug reports in github.
The system now supports mapfiles running in isolates. Instead of using Mapfile.from() just use IsolateMapfile()
Use MarkerContext instead of MarkerCallback for markers.
Avoid using mapViewPosition.getLeftUpper(). Use mapViewPosition.getCenter() instead.
In markers use markerContext.mapCenter.
This is because we do not redraw the map for every position-update but rather only if the position
gets out of the boundary of the map.
mapViewPosition.getCenter() returns the CURRENT center (=position)
whereas markerContext.mapCenter returns the center of the map which may be different if the map moved since the
last redraw.
instead of
xxxMarker(
    markerCaption: MarkerCaption(
        text: "abc",
    ...
    ),
)
use
xxxxMarker(
    ...
)..addCaption(
    caption: "abc",
    ...
);
If your users are online while viewing the maps do not use that library. While it is possible to show online-maps there are much simpler libs available out there to perform this task.
See doc/usage.md
See doc/structure.md