Your first Project
Top bar navigation [1] At the moment, titra has three selection options:
- Track - opens the time tracking view.
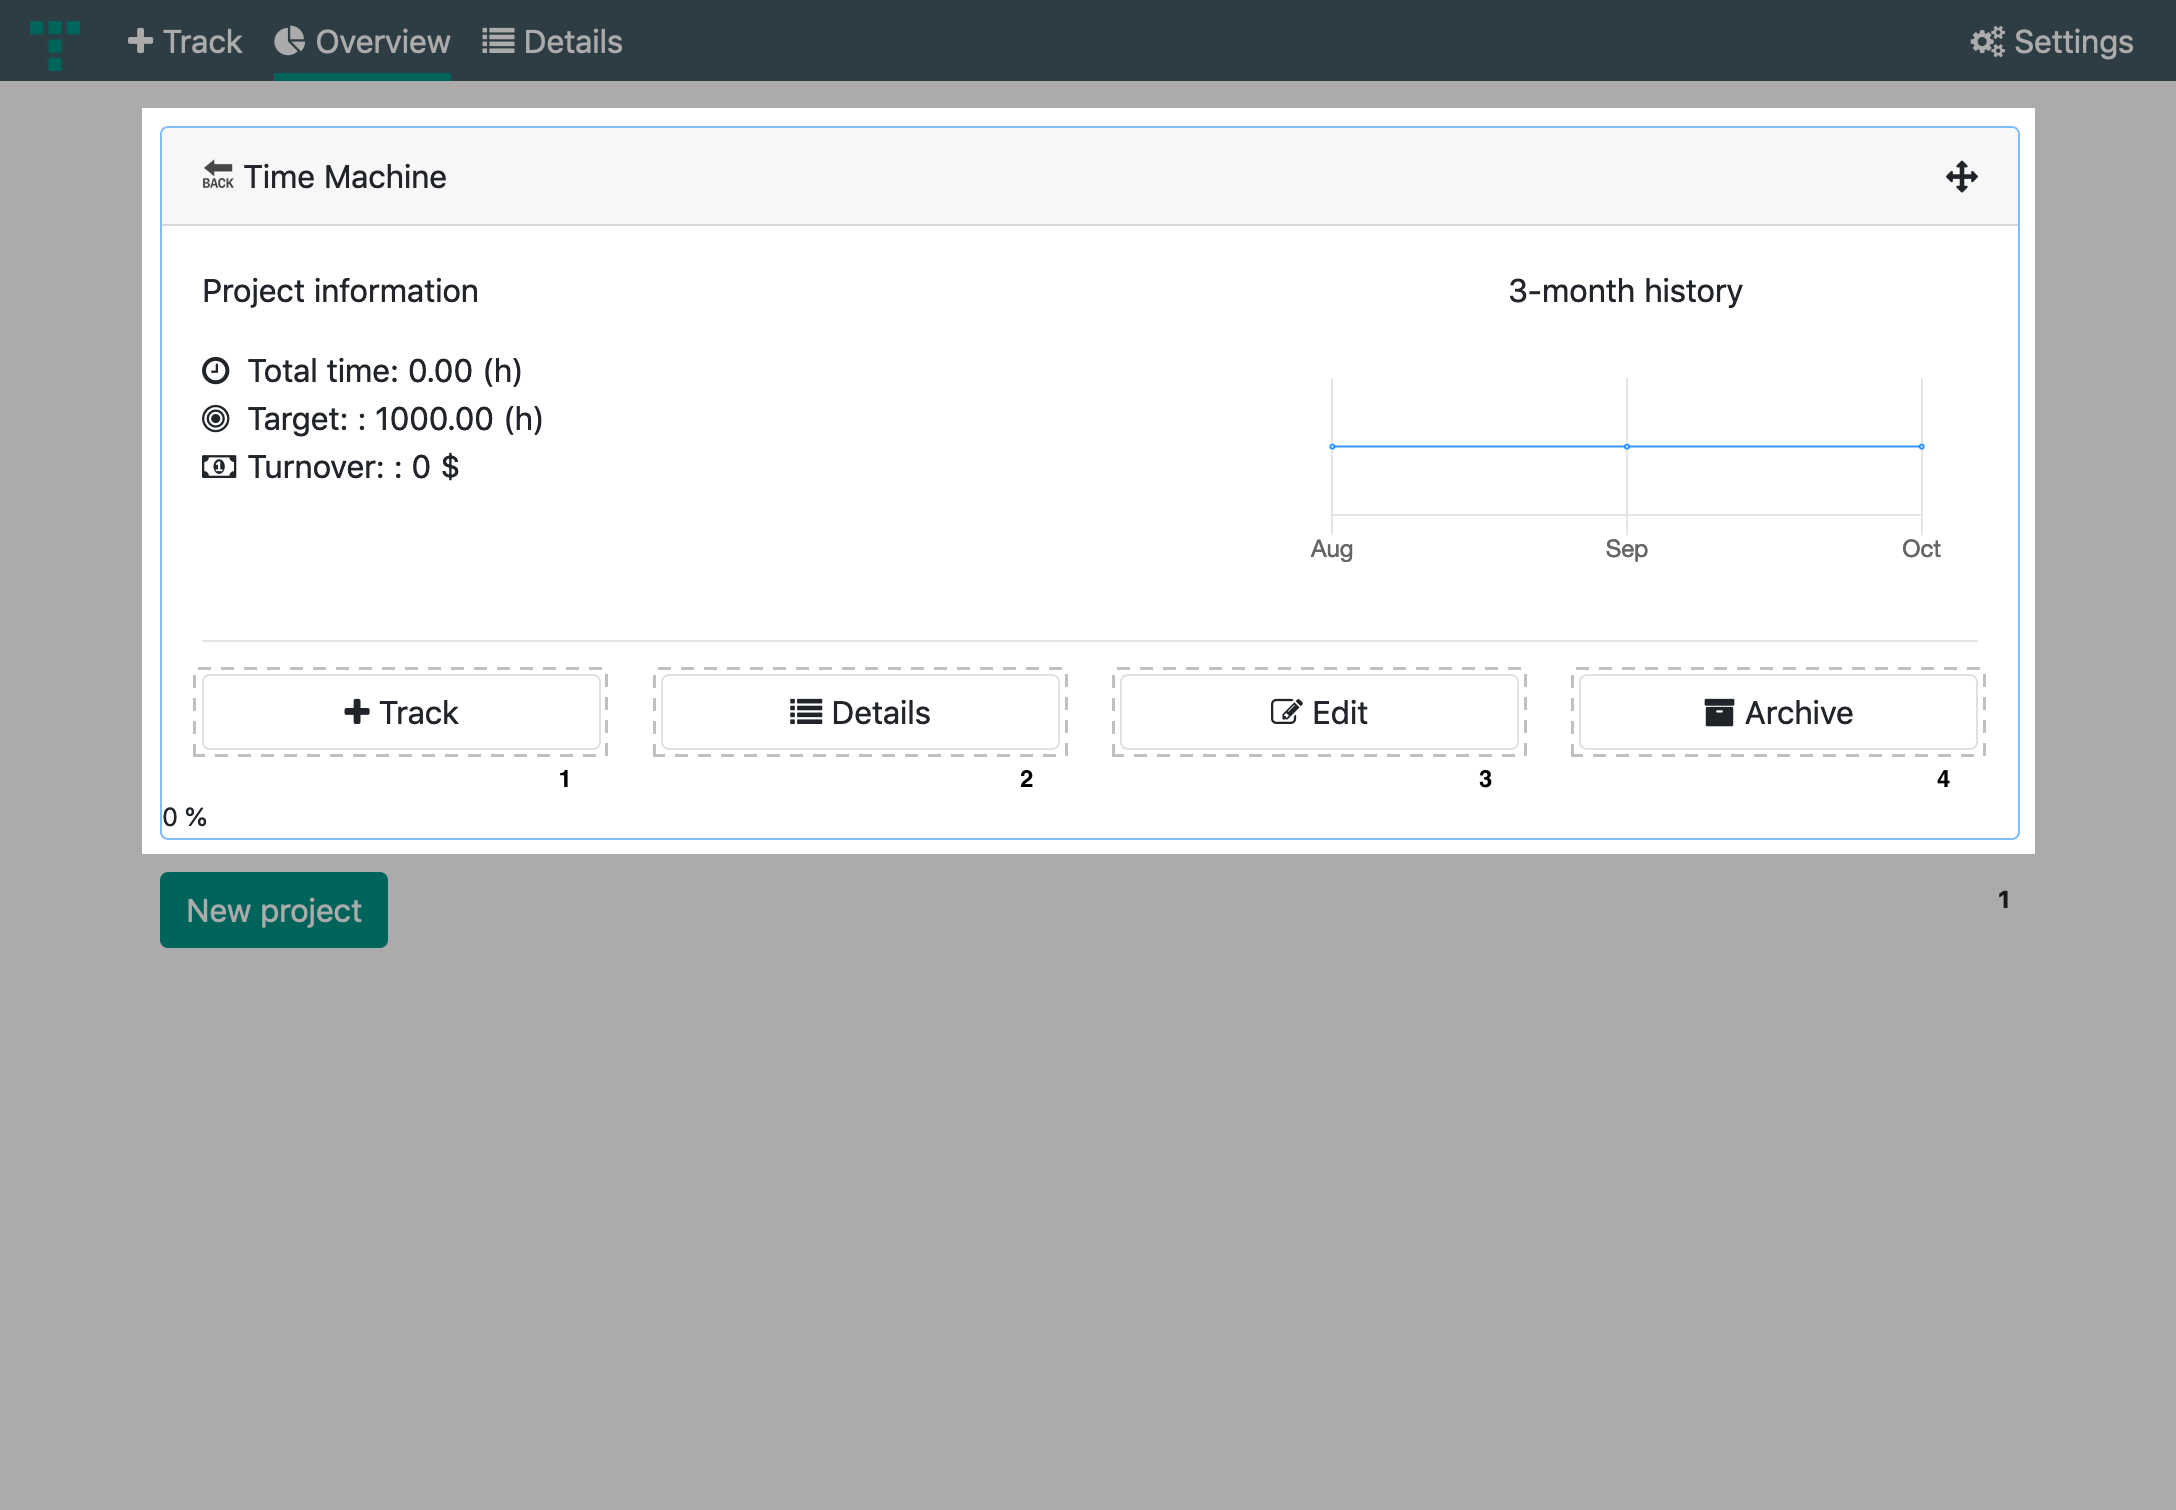
- Overview - opens the project overview with histogram and pie chart.
- Details - opens the table view with detailed information and filter possibilities.
Settings [2] More information about the settings can be found here.
New Project [3] Adds a new project and opens its options.

💬 The colored underline below the navigation indicates which view you are currently in.
▪️ First click on the New project button [3]. The settings page will be opened.
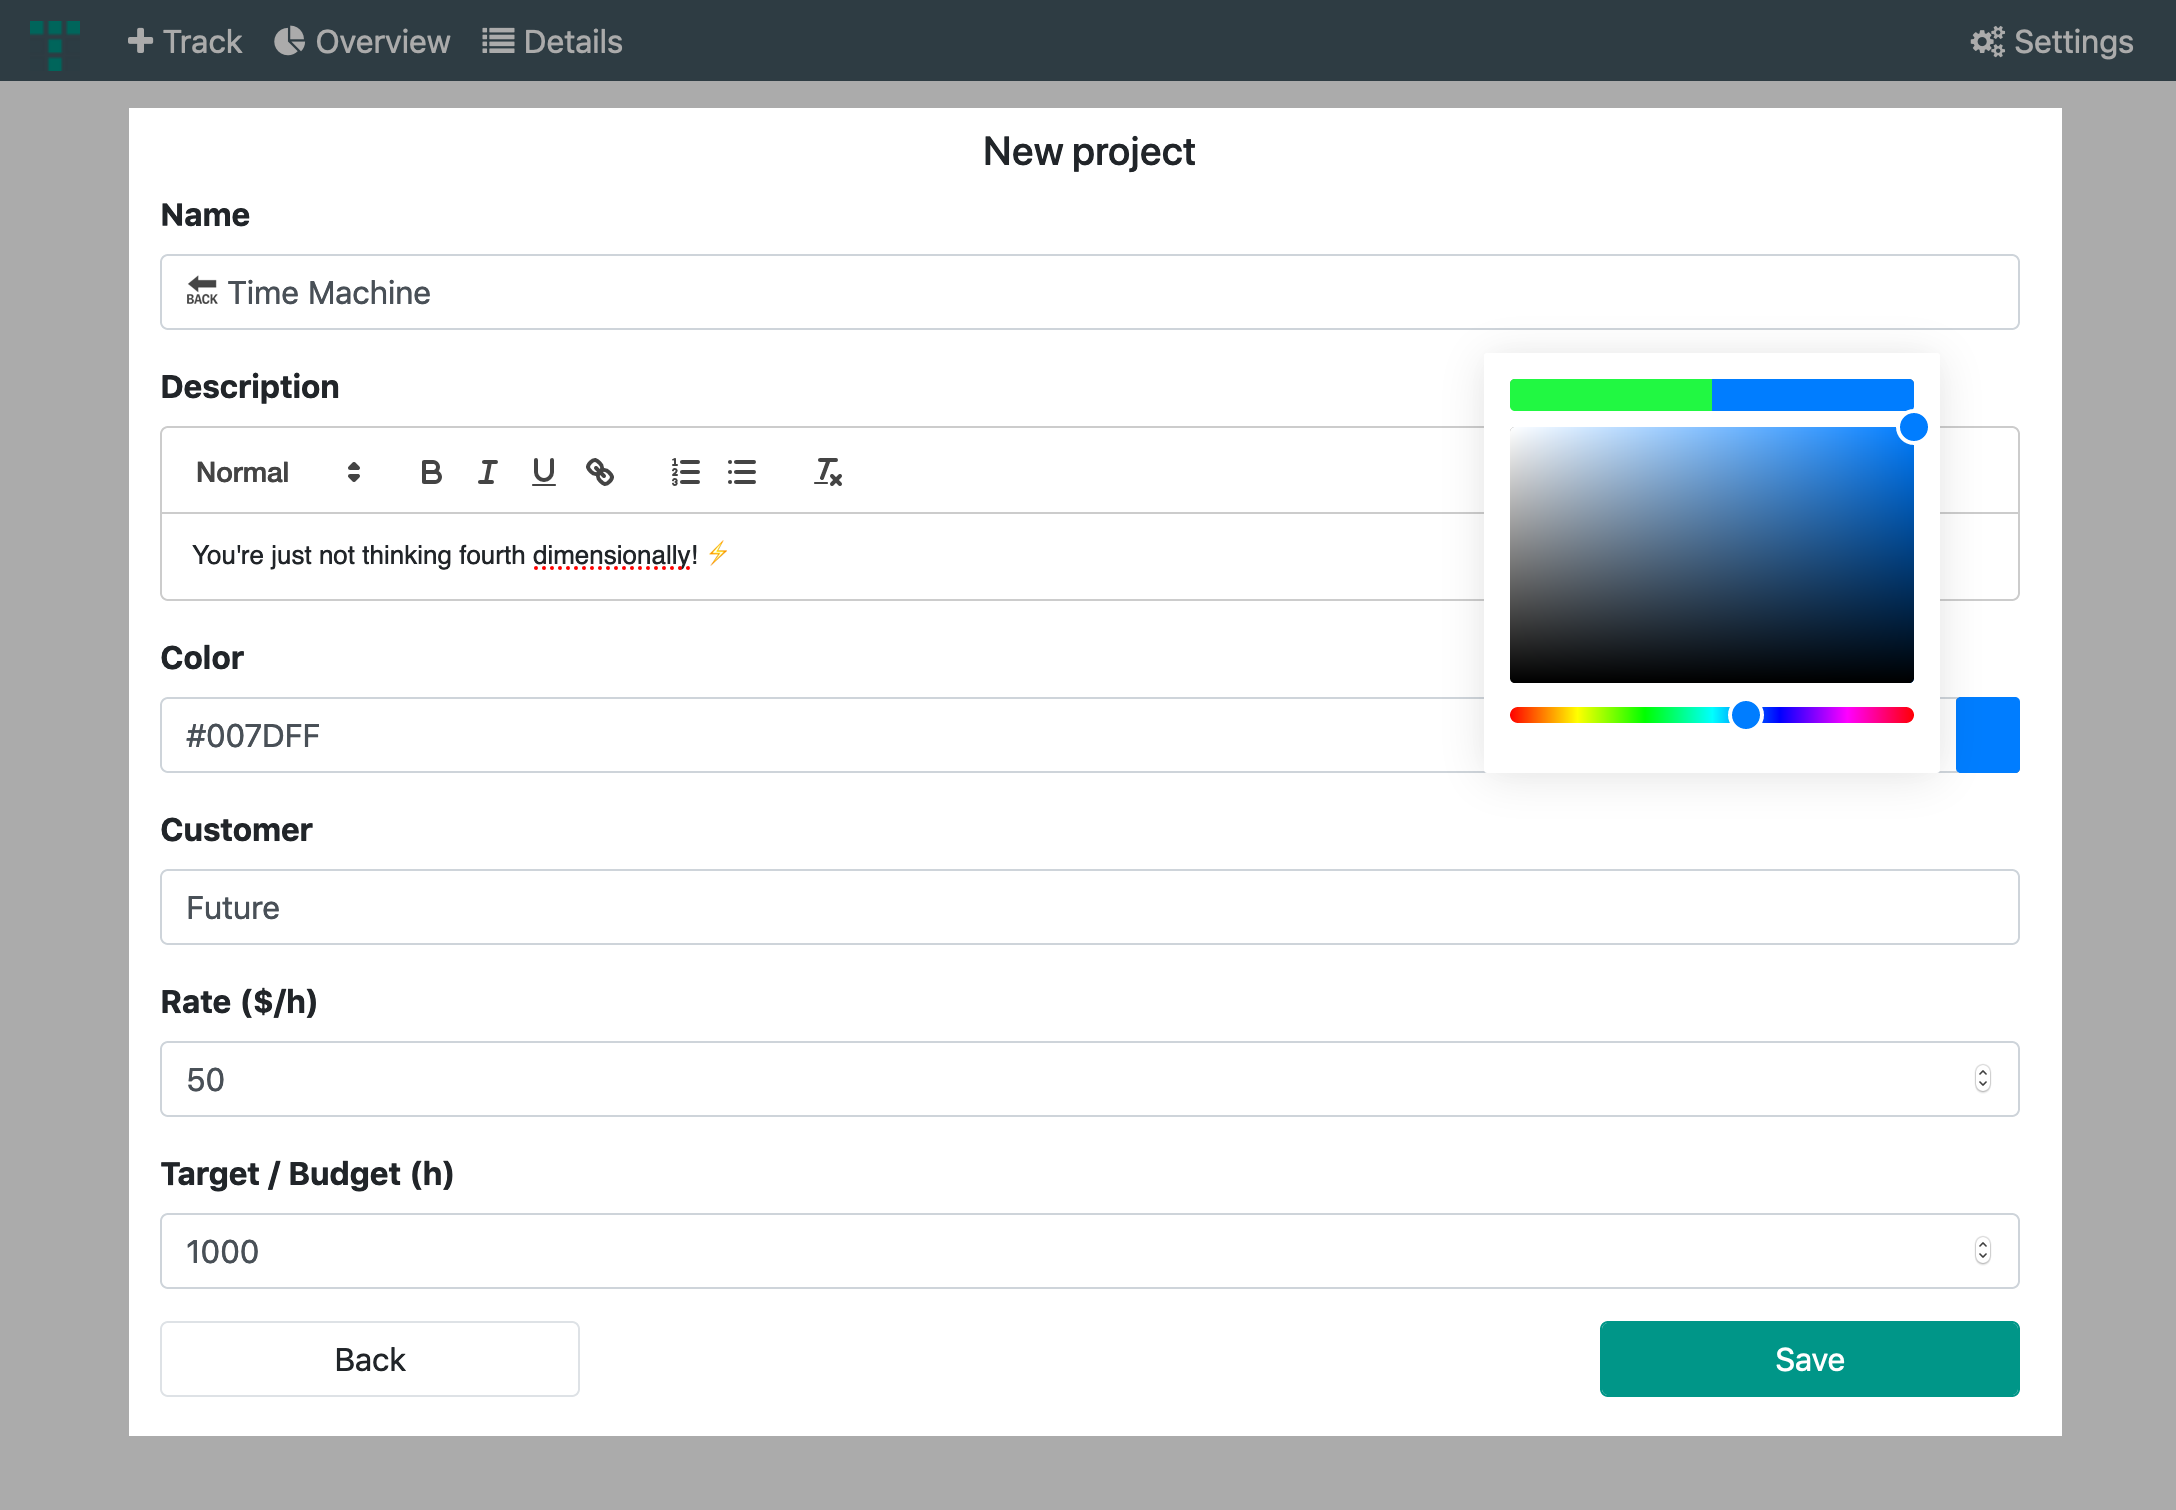
💬 The project will not be created until the settings are saved for the first time.
▪️ Add a Name for your project.
▪️ Add a project Description.
▪️ Set a custom Color to the project. Click colored button to open the color picker.
▪️ Add a Customer to the project.
▪️ Set a Rate($/hour) to the project. For example: 50$ per tracked hour.
▪️ Set a Target/Budget to the project. For example: 1000 hours.
▪️ Press Save to create the Project. The project settings can be adjusted at any time.
▪️ The Access rights are displayed after saving. Add colleagues or co-workers to give them access to the project. Type in the e-mail of your contact and press the Add button. Repeat the process to add more contacts.
To grant access to all users enable the check box ☑️ Public project (visible to all users)
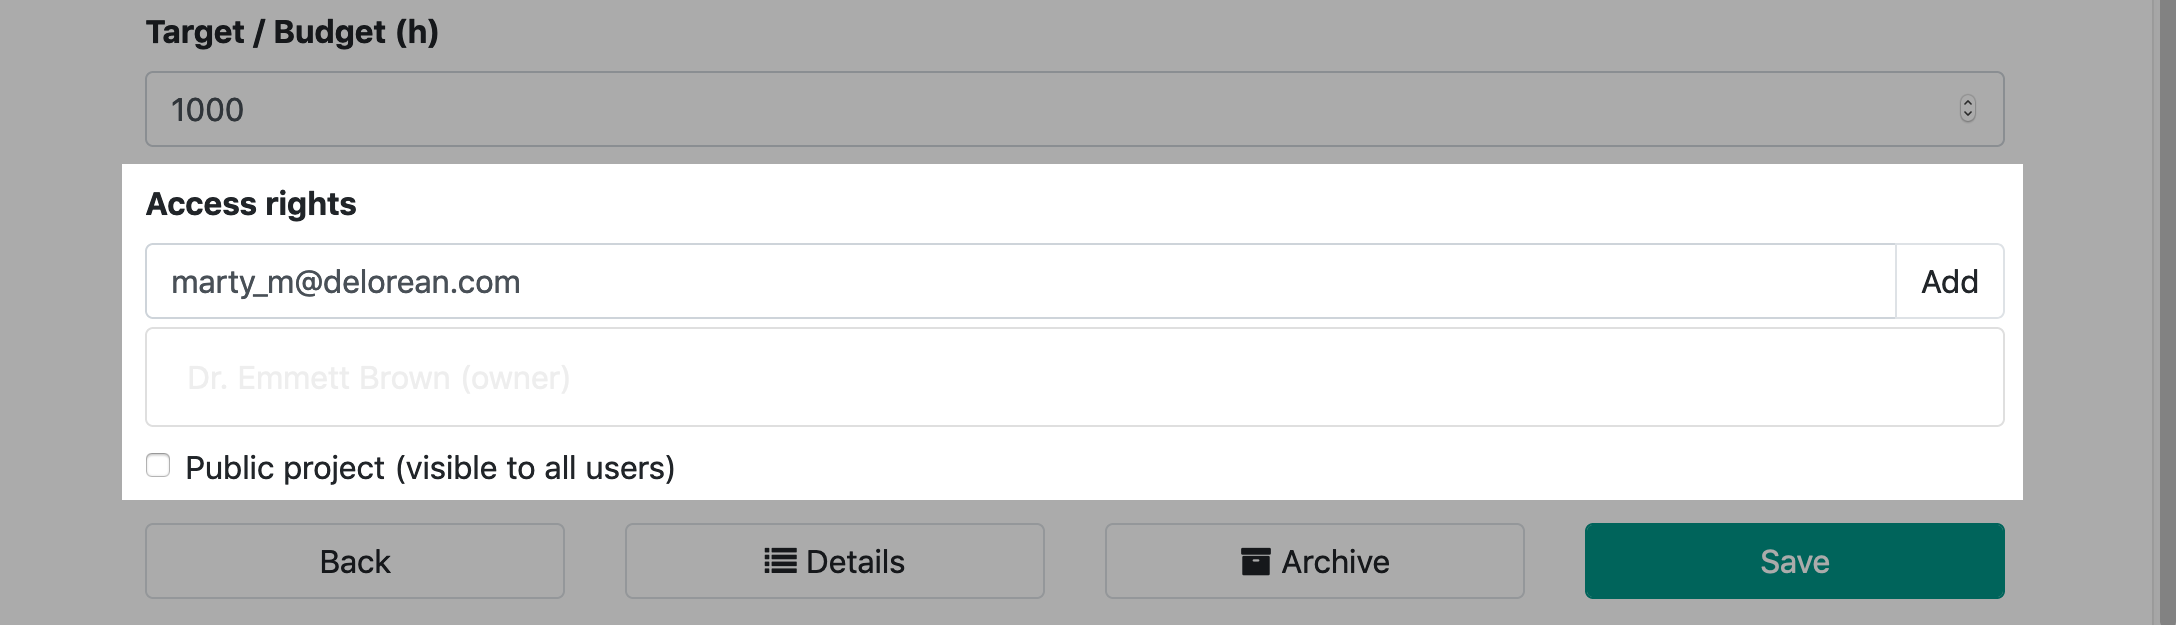
💬 Dont forget to save your changes 😉
After creating a project... **WIP **
 visit us on