| layout | title | order | language |
|---|---|---|---|
documentation |
Install and upgrade |
2 |
en |
{% include toc.md %}
The official installation method requires a Linux server with the following tools installed:
- docker{:rel="nofollow"}
- docker-compose{:rel="nofollow"}
- curl (very likely already installed by your Linux distribution)
Docker version 19.03.8, build afacb8b7f0
~/$ docker-compose -v
docker-compose version 1.24.0, build 0aa59064
~/$ curl --version
curl 7.70.0 (x86_64-pc-linux-gnu) ...
Release-Date: 2020-04-29
Protocols: ...
Features: ...
Hardware requirement is minimal: 64MB of RAM and 1 core will give you plenty of comfort. If you're expecting some heavy load, check out our benchmark
The installation can be done in 3 bash commands:
~/filestash$ curl -O https://downloads.filestash.app/latest/docker-compose.yml
% Total % Received % Xferd Average Speed Time Time Time Current
Dload Upload Total Spent Left Speed
100 322 100 322 0 0 98 0 0:00:03 0:00:03 --:--:-- 98
~/filestash$ docker-compose up -d
Creating filestash_app ...
Creating filestash_app ... done
Note: Official Docker images are available on DockerHub.
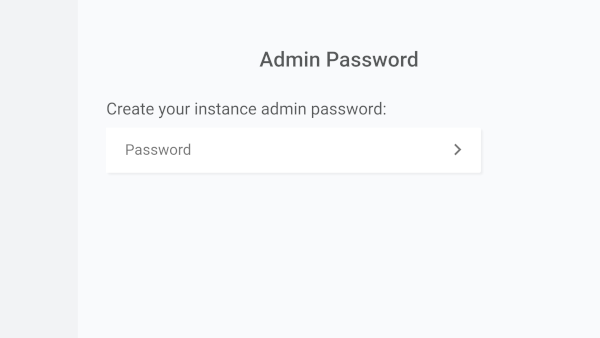
Once the installation has completed, open up a browser and go to: http://your_ip:8334. You will be asked to set an admin password:
-
For a production instance, it is advised to fill the
hostvalue underconfigure->generalwith your domain name. This enables some additional security measures like HSTS and host name verification. -
You can enable full-text search via the admin console. This feature is disabled by default for 2 reasons:
- associated cost when you use a vendor like [S3]({% post_url 2019-11-21-s3-browser %}) that charges both for the bandwith and API calls. In your settings you can change the reindex time to a higher value to minimise cost at the expense of having some stale data in your index.
- privacy concerns, as creating a searchable index will result in your instance crawling through your content and keep some persistent data locally for the purpose of answering search queries.
Upgrades are straightforward:
% Total % Received % Xferd Average Speed Time Time Time Current
Dload Upload Total Spent Left Speed
100 322 100 322 0 0 98 0 0:00:03 0:00:03 --:--:-- 98
~/filestash$ docker-compose pull
Pulling app (machines/filestash:latest)...
latest: Pulling from machines/filestash
Digest: sha256:4da068a5868d736f6382618e6f8baa6cf44c1cf0f94a3ded05aa25b00a41f425
Status: Image is up to date for machines/filestash:latest
~/filestash$ docker-compose up -d
Recreating filestash_app ...
Recreating filestash_app ... done
Warning: to date, Docker is the only officially supported installation method that is available free of charge. The reason for this is that creating and maintaining hundreds of guides for every possible Linux distribution isn't trivial with Linux packaging alone being a massive rabbit hole that can only be illustrated by this XKCD{:rel="nofollow"}. If you need to have Filestash working in a production without Docker, contact us and we'll make it work as part of a support contract
In the meantime, community guides are also available:
- SRugina: ubuntu instructions + script
- sehnryr: Installing Filestash on Debian 10 (Buster)
- add your own with a PR
If you want to build and install Filestash by yourself, the reference is the Dockerfile{:rel="nofollow"}. This recipe is just one example of a custom build with an emphasis on speed, efficiency and features at the cost of installation size. You could shrink down the required space by 90% by disabling features such as image transcoding (getting rid of libvips and libraw), org-mode export (getting rid of emacs and our latex distribution) and other tools (such as pdftotext).
Using a reverse proxy isn't mandatory but it is quite useful when you have multiple services installed on your server and can't dedicate ports 80 and 443 to one specific application.
A sample configuration for Nginx:
# change the env variable to what you want to use
export FILESTASH_DOMAIN=demo.filestash.app
openssl dhparam -out /etc/letsencrypt/live/$FILESTASH_DOMAIN/dh2048.pem -outform PEM -2 2048

cat > /etc/nginx/sites-available/filestash.conf <<EOF
server {
    listen         80;
    server_name    $FILESTASH_DOMAIN;
    return         301 https://\$server_name\$request_uri;
}
server {
    listen 443 ssl;
    server_name $FILESTASH_DOMAIN;
    expires \$expires;

    ssl on;
    ssl_certificate /etc/letsencrypt/live/$FILESTASH_DOMAIN/fullchain.pem;
    ssl_certificate_key /etc/letsencrypt/live/$FILESTASH_DOMAIN/privkey.pem;
    ssl_dhparam /etc/letsencrypt/live/$FILESTASH_DOMAIN/dh2048.pem;
    ssl_protocols TLSv1.1 TLSv1.2;
    ssl_ciphers 'ECDHE-ECDSA-CHACHA20-POLY1305:ECDHE-RSA-CHACHA20-POLY1305:ECDHE-ECDSA-AES128-GCM-SHA256:ECDHE-RSA-AES128-GCM-SHA256:ECDHE-ECDSA-AES256-GCM-SHA384:ECDHE-RSA-AES256-GCM-SHA384:DHE-RSA-AES128-GCM-SHA256:DHE-RSA-AES256-GCM-SHA384:ECDHE-ECDSA-AES128-SHA256:ECDHE-RSA-AES128-SHA256:ECDHE-ECDSA-AES128-SHA:ECDHE-RSA-AES256-SHA384:ECDHE-RSA-AES128-SHA:ECDHE-ECDSA-AES256-SHA384:ECDHE-ECDSA-AES256-SHA:ECDHE-RSA-AES256-SHA:DHE-RSA-AES128-SHA256:DHE-RSA-AES128-SHA:DHE-RSA-AES256-SHA256:DHE-RSA-AES256-SHA:ECDHE-ECDSA-DES-CBC3-SHA:ECDHE-RSA-DES-CBC3-SHA:EDH-RSA-DES-CBC3-SHA:AES128-GCM-SHA256:AES256-GCM-SHA384:AES128-SHA256:AES256-SHA256:AES128-SHA:AES256-SHA:DES-CBC3-SHA:!DSS';
    ssl_ecdh_curve secp384r1;

    # file upload limit
    client_max_body_size 1024M;

    location / {
        proxy_http_version 1.1;
        proxy_set_header Upgrade \$http_upgrade;
        proxy_set_header Connection "upgrade";

        proxy_set_header     Host \$host:\$server_port;
        proxy_set_header     X-Real-IP \$remote_addr;
        proxy_set_header     X-Forwarded-For \$proxy_add_x_forwarded_for;
        proxy_set_header     X-Forwarded-Proto \$scheme;
        proxy_set_header     Origin '';

        add_header Strict-Transport-Security "max-age=31536000; includeSubDomains" always;

        proxy_pass           http://127.0.0.1:8334;
        proxy_read_timeout   86400;
    }
}
EOF

ln -s /etc/nginx/sites-available/filestash.conf /etc/nginx/sites-enabled/filestash.conf
nginx -t && service nginx restart
Note: Resist the temptation of using gzip or other caching mechanisms at reverse proxy level, you would waste valuable CPU cycles adding latency and increasing bandwith usage, creating issues with cache invalidation. Filestash is already doing its best at compile time, optimising performance at a level no reverse proxy could ever compete with by using a few lines of configuration and no deep knowledge of the underlying service.
You can make the configuation of your instance persistent by using bind mounts in the docker-compose.yml file.
This might be useful if you use tools like watchtower to automatically upgrade deployed containers.
In most use-cases only the /app/data/statedirectory should be bound, as it contains the configuration files and database.
Filestash currently does not create the needed files in an empty mount. Instead, you need to copy the base configuration after the first start.
- Create the directory which shall be used for the mount
- Use the provided
docker-compose.ymlto start the container (do not add thevolumes-tag yet):docker-compose up -d - Copy the contents of the
/app/data/state/directory from within the running container to your host directory by issuing the following command on the host:docker cp filestash:/app/data/state /path/to/your/local/mount/directory(The name of the container may vary depending on your configuration) - Stop and remove the container:
docker-compose down - Add the following block to you
docker-compose.yml(at the same indent level asimage):
...
volumes:
      - path/to/your/local/mount/directory:/app/data/state
...
At the next start, the container will use the files saved on the host and your configuration will be kept throughout restarts and upgrades.
Keep in mind that updates may change the structure of the directory and therefore may require you to modify the contents of the mount by hand, although the goal is to automatically migrate via scripts in this case.