As a best practice, it is currently recommended to limit the number of Adaptive Card Extentions (ACE) to about 20 on the dashboard for the best viewing experience.
If you have lots of cards, or you are simply looking to "tidy up" your dashboard to make room for new cards, you can move simple cards into a SharePoint List and configure ACE QUick Access Links to retrieve items from that list and provides a menu of simple "sub-cards" when clicked.
| The Quick Access Adaptive Card Extension. |
Please Note: ACEs that contain complex, large, or fetch external data are not good candidates for this solution. Only simple cards can be leveraged within ACE Quick Access Links.
Ideal candidates are links that are logically related to each other, such as Benefits Systems (links to Paystub, Time & Expense, Vacation, etc.) or Helpdesk Systems (links to open tickets, check on tickets, etc.).
You can create multiple SharePoint Lists and a seperate ACE Quick Access Links card for each, giving you many ways to combine links and organize your dashboard.
The solution consists of two components: The Quick Access Links Adaptive Card Extension and the Quick Access Links SharePoint List.
This Adaptive Card Extension (ACE) provides the user interface and simple business logic required to render the initial card and links in the Viva Connections Dashboard.
| The Quick Access Adaptive Card Extension in the Viva Connections Dashboard. |
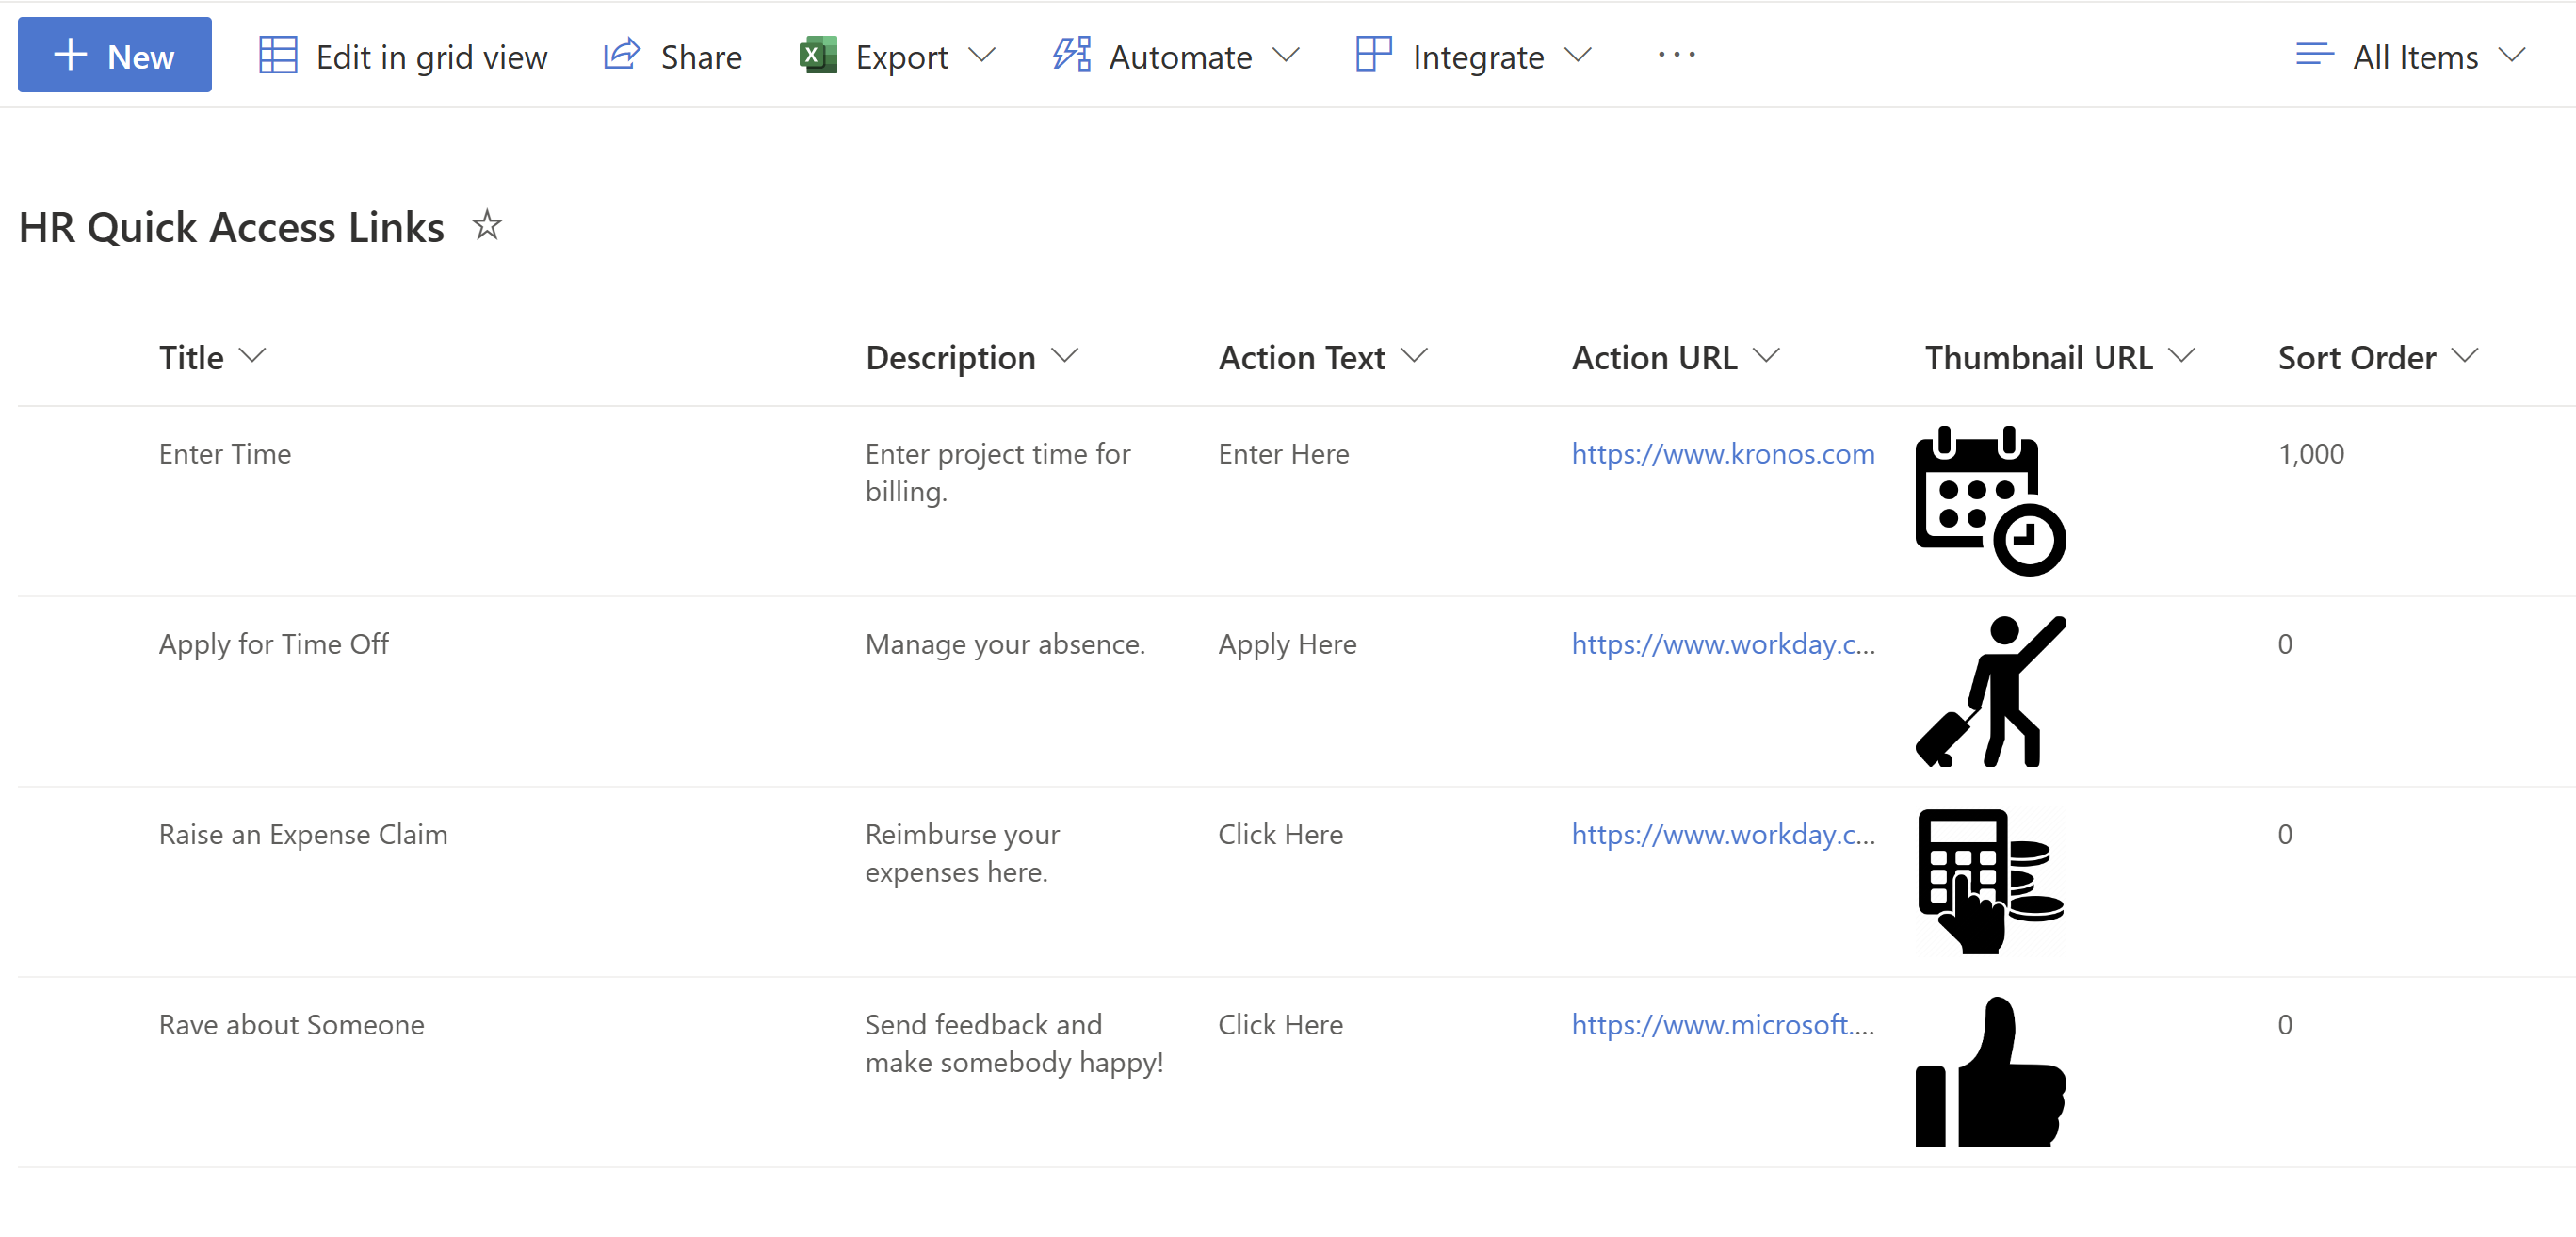
This SharePoint List stores the link data for and individual Quick Access Links Adaptive Card Extension instance. It contains columns for link title, subtitle, action button URL, action button text, sort order, and an image for the link.
 |
|---|
| The Quick Access Links List in SharePoint supplies the data to the Quick Access ACE. |
Installation of ACE Quick Access Links has the following steps:
- Confirm all
requiredprerequisites. - Install the SharePoint Solution package.
- Create at least one SharePoint List in a SharePoint site configured as your organization's Home Site.
- Configure the Quick Access Links card in your Viva Connections Dashboard.
RequiredYour organization's intranet is in SharePoint.RequiredYour organization has configured a Home Site.
Important: It is theoretically possible to install this solution into SharePoint Server (on-premises) but this scenario has not been tested. Proceed at your own time and expense.
NOTE: You will need to be a member of the SharePoint Administrator Role to perform this step.
NOTE: You will need to be a member of the SharePoint Site Collection Administrators Group for your Viva Connections Home Site to perform this step.
NOTE: You will need to be a member of the SharePoint Site Collection Administrators Group for your Viva Connections Home Site to perform this step.
At this point, you should have successfully installed the SharePoint Solution Package and created a Quick Access Links List in SharePoint.
Before you Begin
- Ensure you have PnP.PowerShell installed.
- Download the Create-List.ps1 script to your local machine.
Navigate to the folder you downloaded Create-List.ps1 and run the following command:
Connect-PnPOnline -Url <your-site-url> -UseWebLogin
.\Create-List.ps1
If the list already exists, you will need to either
- Specify a new list name with the
-ListNameswitch.
.\Create-List.ps1 -ListName <your-list-name>
- Specify the
-Overwriteswitch. IMPORTANT! THis will clobber the existing list.
.\Create-List.ps1 -Overwrite
- Open Microsoft Lists
- Under *Create a List*, select *Blank List*.
You can create the SharePoint list manually if needed, but it is recommended to use the Create-List.ps1 PowerShell script. Make sure you create the columns exactly as specified in the table below.
| Column | Type | Notes |
|---|---|---|
| Title | Single Line of Text | The title of the link. You won't need to create this, as SharePoint creates a Title column by default. Just insure it's there. |
| Description | Multiple Lines of Text | A brief description of the link. |
| ActionText | Single Line of Text | The text for the "call to action". This text will appear in the action button. |
| ActionURL | Hyperlink or Picture | The URL for the "call to action". This URL will be launced when the action button is clicked. Make sure the format is "Hyperlink" and NOT "picture". |
| ThumbnailURL | Thumbnail | A picture that will be used for the link. |
| SortOrder | Number | The sort order for the link when displayed in the ACE. Sort order is descending. |
| Solution | Author(s) |
|---|---|
| folder name | Author details (name, company, twitter alias with link) |
| Version | Date | Comments |
|---|---|---|
| 1.1 | March 10, 2021 | Update comment |
| 1.0 | January 29, 2021 | Initial release |
THIS CODE IS PROVIDED AS IS WITHOUT WARRANTY OF ANY KIND, EITHER EXPRESS OR IMPLIED, INCLUDING ANY IMPLIED WARRANTIES OF FITNESS FOR A PARTICULAR PURPOSE, MERCHANTABILITY, OR NON-INFRINGEMENT.
Get your own free development tenant by subscribing to Microsoft 365 developer program
Any special pre-requisites?
- Clone this repository
- Ensure that you are at the solution folder
- in the command-line run:
- npm install
- gulp serve
Include any additional steps as needed.
Description of the extension that expands upon high-level summary above.
This extension illustrates the following concepts:
- topic 1
- topic 2
- topic 3
Notice that better pictures and documentation will increase the sample usage and the value you are providing for others. Thanks for your submissions advance.
Share your web part with others through Microsoft 365 Patterns and Practices program to get visibility and exposure. More details on the community, open-source projects and other activities from http://aka.ms/m365pnp.
-
Provision SharePoint assets from your SharePoint client-side web part
-
Publish SharePoint Framework applications to the Marketplace
-
Microsoft 365 Patterns and Practices - Guidance, tooling, samples and open-source controls for your Microsoft 365 development
